Showing posts with label Art Gallery. Show all posts
Thank You - Framed Florets & Art Gallery - Demonstrator Training Program Monthly Blog Hop April 2023

Thank You - Framed Florets & Art Gallery - Demonstrator Training Program Monthly Blog Hop April 2023


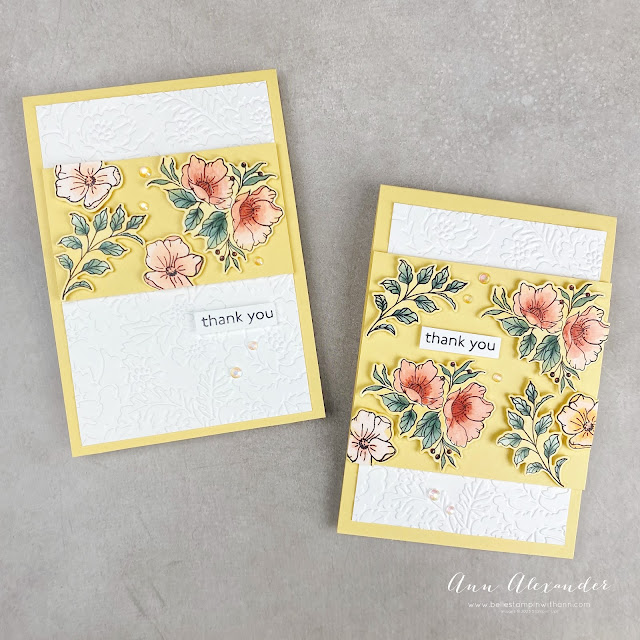
My card for today is for Kylie and Bruno Bertucci's Demonstrator Training Program Blog Hop April 2023. I am so happy that you could join my fellow demonstrators and I today for this blog hop, which I hope will provide you with many ideas and creative inspiration. The theme is "Thank You".

We are a group of Stampin' Up!® Demonstrators from around the world that are taking part in training that is helping us to build a successful Stampin' Up!® business and we really appreciate your support!

You may be starting here or may have come from another blog - either way you can find the link list at the bottom of this post so that you can see every blog post and idea today.

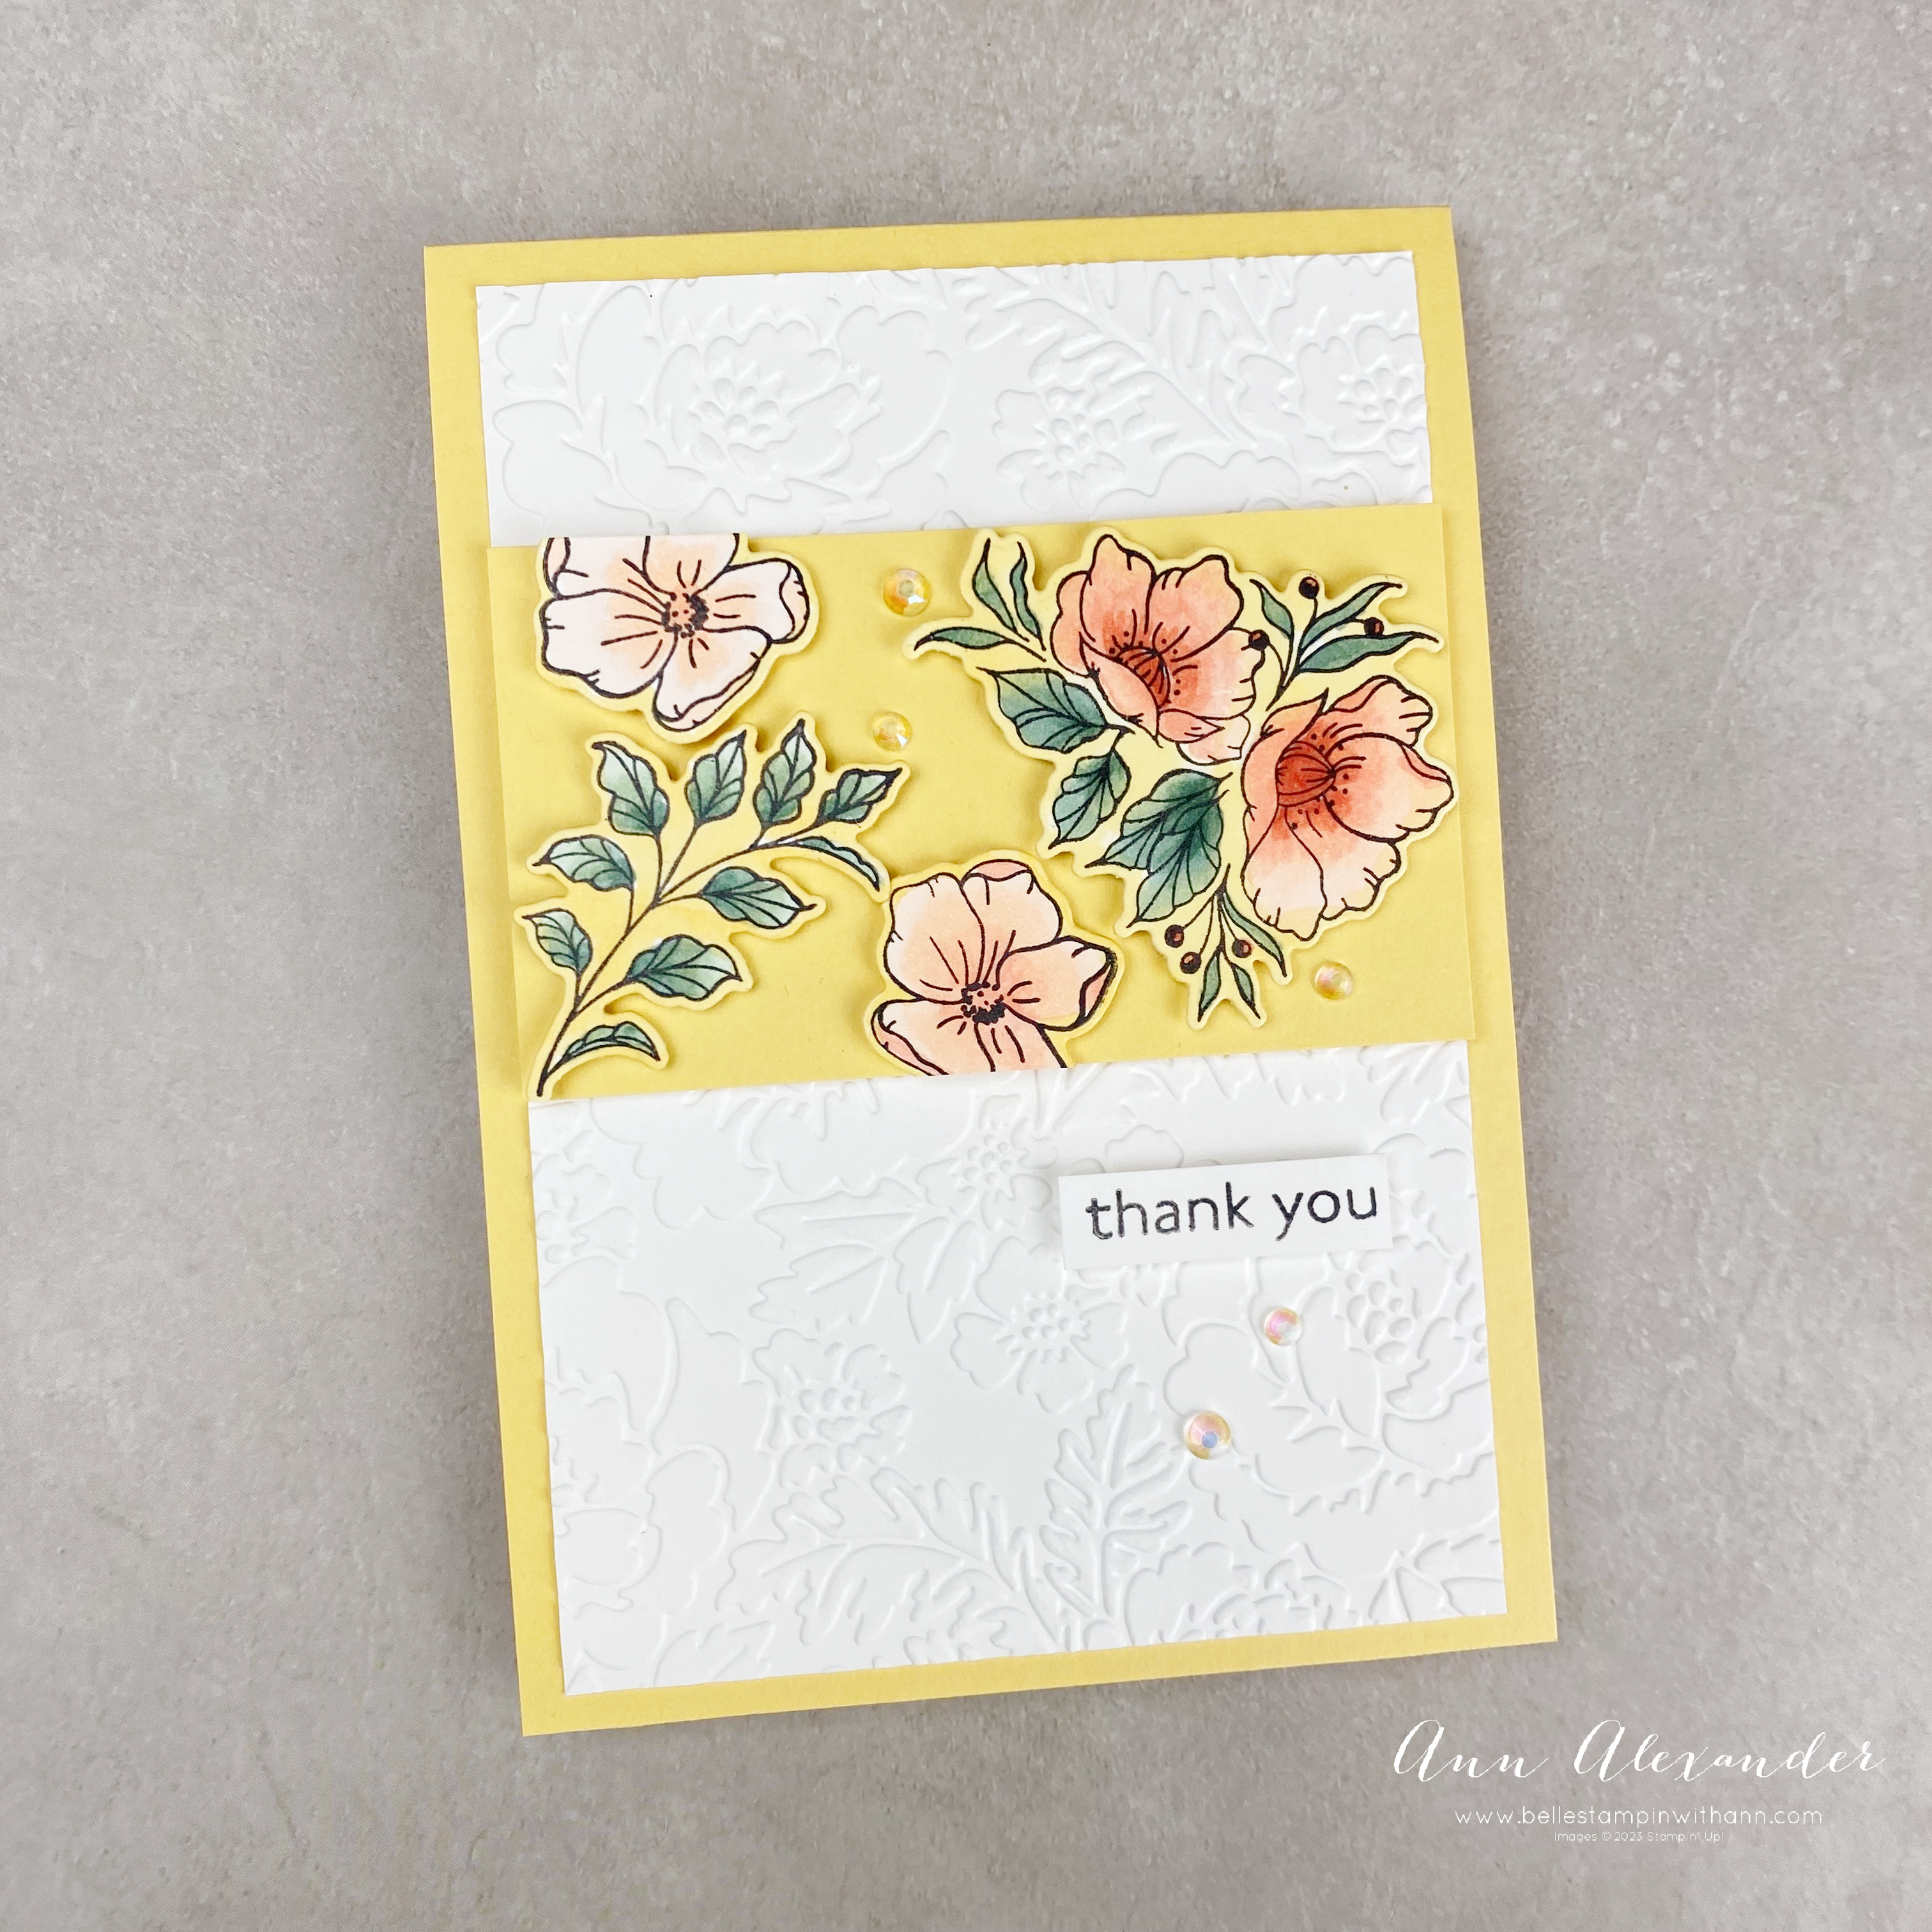
For my cards today, I used the Framed Florets stamp set colouring the images with Stampin' Blends. I used the Pretty Flowers Embossing Folder for the background and the Art Gallery stamp set for the sentiment. All of these items will be retiring soon and can be purchased HERE.

I was inspired by a card from Martin Stone (see HERE for his card) but used retiring stamps and colours for my cards.


Instructions:

- For both cards use a piece of So Saffron for the card base and mat with a piece of the Basic White card which has been embossed with the Pretty Flowers Embossing Folder.

- Stamp flowers and leaves from the Framed Florets stamp on Basic White using Tuxedo Black ink. Colour around the images with So Saffron Stampin' Blends and die cut with the Framed Florets Dies. Colour the images with Stampin' Blends (So Saffron, Pale Papaya, Calypso Coral, Mint Macaron and Soft Succulent). Adhere the die cut pieces onto a piece of So Saffron using Stampin' Dimensionals.

- Stamp a sentiment from the Art Gallery stamp set onto Basic White card using Tuxedo Black ink. Add some Iridescent Rhinestone Basic Jewels to complete.


Thanks so much for stopping by today!

As I mentioned at the top, this is a blog hop so make sure you 'hop' around to all the amazing projects from my fellow demonstrators on this hop! Click on the links below to visit them.

BLOG LINKS: 

Please leave me a comment if you have any questions!*
___

I have a tutorial bundle available. The March 2023 Create With Us Tutorial Bundle features 15 tutorials from Stampin' Up!® designers from around the world and this month we have all created projects that highlight the Rain or Shine Suite Collection. This is an amazing tutorial with so many fantastic ideas.

Visit my Tutorial Page HERE to purchase this bundle.
Read more »
Annie A
8 Comments
I miss you -  Art Gallery & Pierced Blooms - FMS509

I miss you - Art Gallery & Pierced Blooms - FMS509


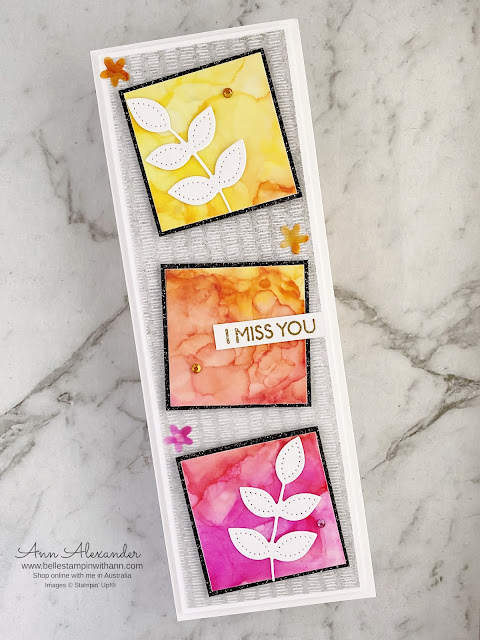
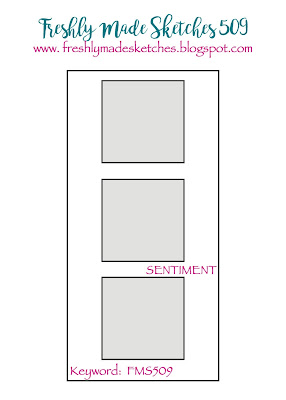
Hello again! Today's card is one I have entered into the Freshly Made Sketches #FMS509 Sketch Challenge this week. 

For this card I used the Art Gallery Stamp Set, Pierced Blooms Dies , Peaceful Place DSP, Black Glitter Paper and Stampin' Blends to create the alcohol ink background. Most of the items on this card were scraps from my desk. 

Instructions:

- Use a piece of Basic White A4 card, cut in half, and then folded in half lengthwise. Mat with a piece of Basic White card and then a piece of Peaceful Place DSP. Cut 3 squares from Black Glitter Paper

- Colour the back of a piece of Vellum with Stampin' blends and use Isopropyl Alcohol with an air blower and Water Painter to move the colours around. Cut 3 squares from this piece and mat onto the Black Glitter Paper (see THIS post for instructions on how to create these types of backgrounds). Attach the Squares onto the Peaceful Place DSP/ Card base.

- Use Pierce Blooms dies to die cut leaves from Basic White and some tiny flowers from the coloured Vellum. Attach the leaves and flowers to the card. Stamp a sentiment from the Art Gallery stamp set using Versamark onto Basic White card. Heat emboss with Gold Stampin' Emboss Powder. Attach to the card with Liquid Glue.

-  Add Holiday Rhinestone Basic Jewels and Stampin' Blends coloured Rhinestone Basic Jewels to the card.

Don't forget to subscribe to my newsletter as I will have dimensions for this card. 

Also don't forget to visit my Tutorial page for my brand new August-September 2021 Sale-a-bration Mega Tutorial Bundle which contains 39 tutorials. Even though Sale-a-bration has finished, there are so many inspiring tutorials in the bundle.I also have the Dandy Garden Mega Tutorial Bundle which contains 62 tutorials for Dragonfly and Dandy Garden inspiration from Demonstrators all over the world and the  Love You Always - Mosaic Card Tutorial available as a tutorial too. 

Read more »
Annie A
4 Comments
I Miss You - Art Gallery & Floral Heart Dies - #FMS492

I Miss You - Art Gallery & Floral Heart Dies - #FMS492


Hello again! Today's card is one I have entered into the Freshly Made Sketches #FMS492 this week. This sketch uses a square card, which I haven't done for a very long time. I love the change of pace using a different sized card, and this one is incredibly simple but I do love how it turned out.

I used the Art Gallery stamp set and combined it with the Floral Heart Dies and Square Vellum Doilies from Stampin' Up!®. I used the leftover heart from THIS card as my centrepiece.

Instructions:

- Use a piece of Basic White A4 Thick Card, and cut down to create a square card.

- Use a smaller piece of Basic White Thick Card for the next layer. Attach a Square Vellum Doily using Stampin' Seal. Attach to the base with Stampin' Dimensinoals.

- Use the Floral Heart dies (I used the leftover die cut heart from my previous card on the blog) to cut a heart from Expressions in Ink Specialty Designer Series Paper. Attach the heart to the card using Stampin' Dimensionals. U

- Stamp the sentiment from the Art Gallery stamp set using Versamark ink onto a small strip of Basic White Thick Card. Use Gold Stampin' Emboss Powder to heat emboss the sentiment, then attach to the card using Stampin Dimensionals.

- Add a gold leaf from the Expressions in Ink Ephemera Pack and some 2021-2023 In colour jewels onto the card.


Don't forget to subscribe to my newsletter as I will have dimensions for this card. 

Don't forget to visit my Tutorial page for the Dandy Garden Mega Tutorial Bundle which contains 62 tutorials for Dragonfly and Dandy Garden inspiration from Demonstrators all over the world. I also have my Love You Always - Mosaic Card Tutorial available as a tutorial too.

Read more »
Annie A
4 Comments
Hello - Art Gallery & Fine Art Floral

Hello - Art Gallery & Fine Art Floral


Hello and welcome back to my blog. Today I am back with a colour combination that anyone who follows me would know I love to use. I am extremely fond of the black, white and gold combination. 

I used the Art Gallery Stamp, Golden Garden Designer Specialty Acetate and Fine Art Ribbon from the Fine Art Floral Suite which is in the Stampin' Up!® Jan-June Mini 2021 catalogue. 

Instructions:

- Use a Basic Black card base, A4 card, cut in half lengthwise. Mat this with a card front piece of the Golden Garden Designer Specialty Acetate. Prior to sticking it down, wrap a piece of the Fine Art Ribbon around the acetate and adhere to the back with Stampin' Seal. When adhering the acetate to the card base, use Stampin' Seal to give it strong adhesion. Make sure to place the adhesive under the other elements to avoid being seen. 

- Cut a piece of Basic Black cardstock and layer a piece of Gold Foil that is embossed with the Greenery Embossing Folder (at an angle) on top of the Basic Black card. Attach the Gold Foil to the Basic Black card with Multipurpose Liquid Glue, and adhere the Basic Black to the card base with Stampin' Dimensionals.

- Stamp the one of the floral stamps from the 'Art Gallery' Stamp set onto a piece of Basic White with Tuxedo Black Ink. Use the coordinating stamp and Versamark Ink and Gold Stampin' Emboss Powder to add the gold accents to the flower. Attach the Basic White card to the embossed Gold Foil at an angle using Stampin' Dimensionals.

- Stamp the 'Hello' sentiment from the 'Quite Curvy' stamp set onto a strip of Basic Black card using Versamark and heat emboss with the Gold Stampin' Emboss Powder. Attach the sentiment to the card using Stampin' Dimensionals.

- Place some gems onto the card front using the now retired Wonderful Gems (you could use Rhinestone Basic Jewels instead).

- Use a piece of Basic White for the inside of the card and attach with Liquid Glue.


Don't forget to subscribe for my newsletter as I will have measurements for this card.

Also don't forget to visit my Tutorial page for the Dandy Garden Mega Tutorial Bundle which contains 62 tutorials for Dragonfly and Dandy Garden inspiration. 

I also have my Love You Always - Mosaic Card Tutorial available as a tutorial too.


My March 2021 Host Code: 9CYNPRKH . When you spend over $40 in my store, you will receive a handmade card and a FREE gift from me.

If you would like to purchase any of these supplies, please click here.

Please email me if you would like a January-June 2021 Catalogue. If would like to receive a 2021-2022 Annual Catalogue early, please contact me before the end of March, and I will send one out to you (Australia only).

Click here to Join my team, 

If you would like regular updates from me, click my blog link here, and my newsletter link here.

Follow me on social media via Facebook, Instagram and Pinterest.

Have a great day and hope you are having a crafty weekend.


Product List
Read more »
Annie A
0 Comments
I am an Independent Stampin' Up! Demonstrator