Showing posts with label Artisan Design Team. Show all posts
Artisan Design Team - December 2022 - Joyful Flurry

Artisan Design Team - December 2022 - Joyful Flurry


Hello and welcome to my blog! Today I am sharing my last Stampin' Up!® Artisan project which is part of the December monthly showcase projects for the Stampin' Up!® Artisan Design Team! 

For this month's projects, I was asked to use the Joyful Flurry Bundle which consists of the Joyful Flurry Stamp Set and Frosted Flurry Dies. 

Don't forget to visit the Stampin' Up!® Corporate Facebook Page (here) or the Stampin' Up Official Instagram page (here) to see what the other Artisan Team Members have created with this set. 


Here is the Joyful Flurry Bundle:


Joyful Flurry Stamp Set:
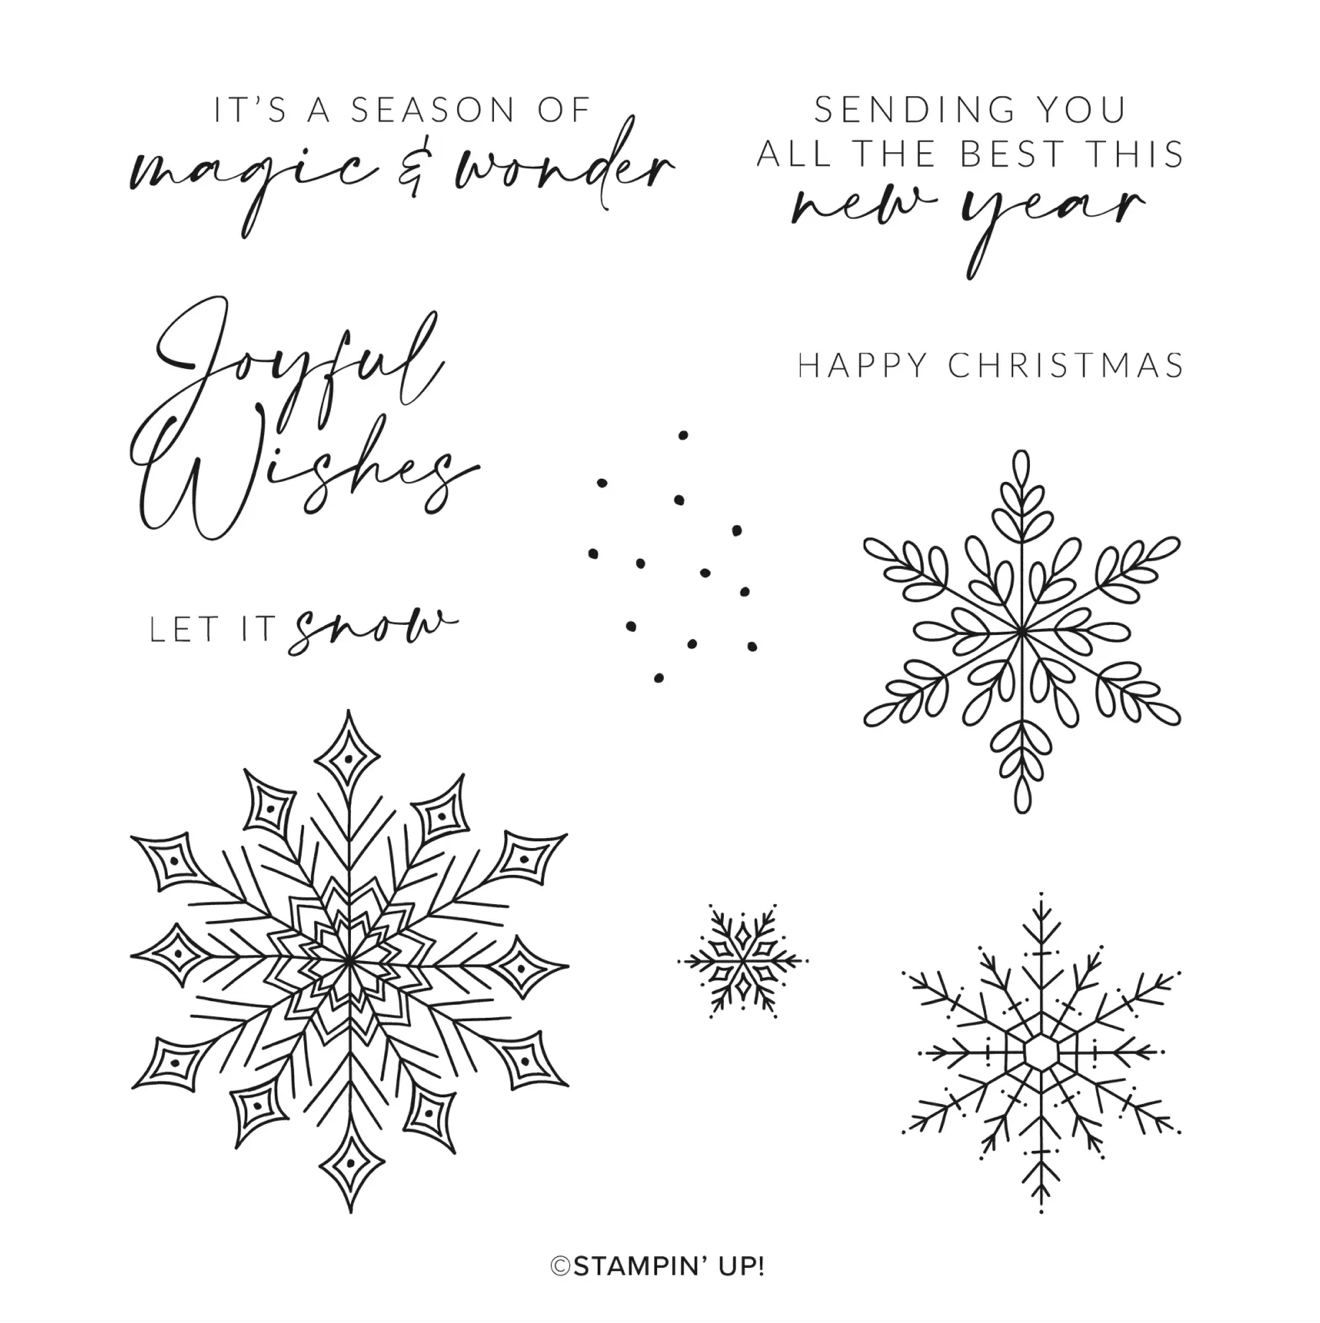

The Frosted Flurry Dies :


Happy Christmas


Instructions: 

- Use Very Vanilla for the base and layer with Polished Pink. Use a piece of Petal Pink and use the various snowflakes from the Frosted Flurries Dies and die cut into the piece of Petal Pink. Stamp snowflakes from the Joyful Flurries stamp set onto this piece with Polished Pink ink. 

- Die cut snowflakes from Gold & Vanilla Glimmer Specialty Paper using the dies and adhere to the snowflakes and the card. Add some Iridescent Rhinestone Basic Jewels to the snowflakes.  Stamp the sentiment from the Joyful Flurry set using Polished Pink onto Very Vanilla and adhere.

TIP: 

Use your Take Your Pick tool to lift the die cut arms of the snowflakes to show the Polished Pink card underneath. 

Let It Snow


Instructions:

- Use a piece of Very Vanilla and die cut two circles using the Layering Circles Dies. Emboss wit the Snowflake Wintry Embossing Folder. Stamp the snowflakes using Versamark ink and heat emboss with White Stampin' Emboss Powder and die cut the Frosted Flurry Dies. Layer these with snowflakes die cut from Glimmer Specialty Paper with the Frosted Flurry dies.  Add Rhinestone Basic Jewels to the centre of the snowflakes.

- Use the Snowflake Specialty Vellum 2 pieces of  2" x 12", score at 1/4" intervals and accordion fold the pieces and then adhere to each other, flatten the one long piece into a rosette and use glue to adhere to it at the centre. Adhere the snowflake circle on top with the glue. Repeat this process to create the second rosette.

- Stamp the sentiment from the Joyful Flurry using Tuxedo Black onto Very Vanilla. Die cut with one of the label dies from the Frosted Flurry Dies. Adhere to the first snowflake. Use a piece of White Glittered Organdy Ribbon, loop behind one of the rosettes and adhere both the rosettes and snowflake decorations to it to create a hanging Christmas ornament. Add some Iridescent Rhinestone Basic Jewels to the centres of the snowflakes.

TIP:

- Use a Hot Glue Gun to glue the rosette together, to adhere the snowflake topper and also to adhere the White Glittered Organdy Ribbon.

- Use Patterned Paper,  Specialty paper or Plain Vellum to create the Rosettes to create a different look.
__________________________________

I have a new tutorial bundle available this month. The December 2022 Create With Us Tutorial Bundle features 15 tutorials from Stampin' Up!® designers from around the world and this month we have all created projects that are Giftable. This is an amazing tutorial with so many fantastic ideas.


Visit my Tutorial Page HERE to purchase this bundle.
____________________

I also have a tutorial bundle available highlighting the Splendid Day Suite Collection containing 27 Tutorials from myself and demonstrators from all over the world. All tutorials contain measurements in both Imperial and Metric.
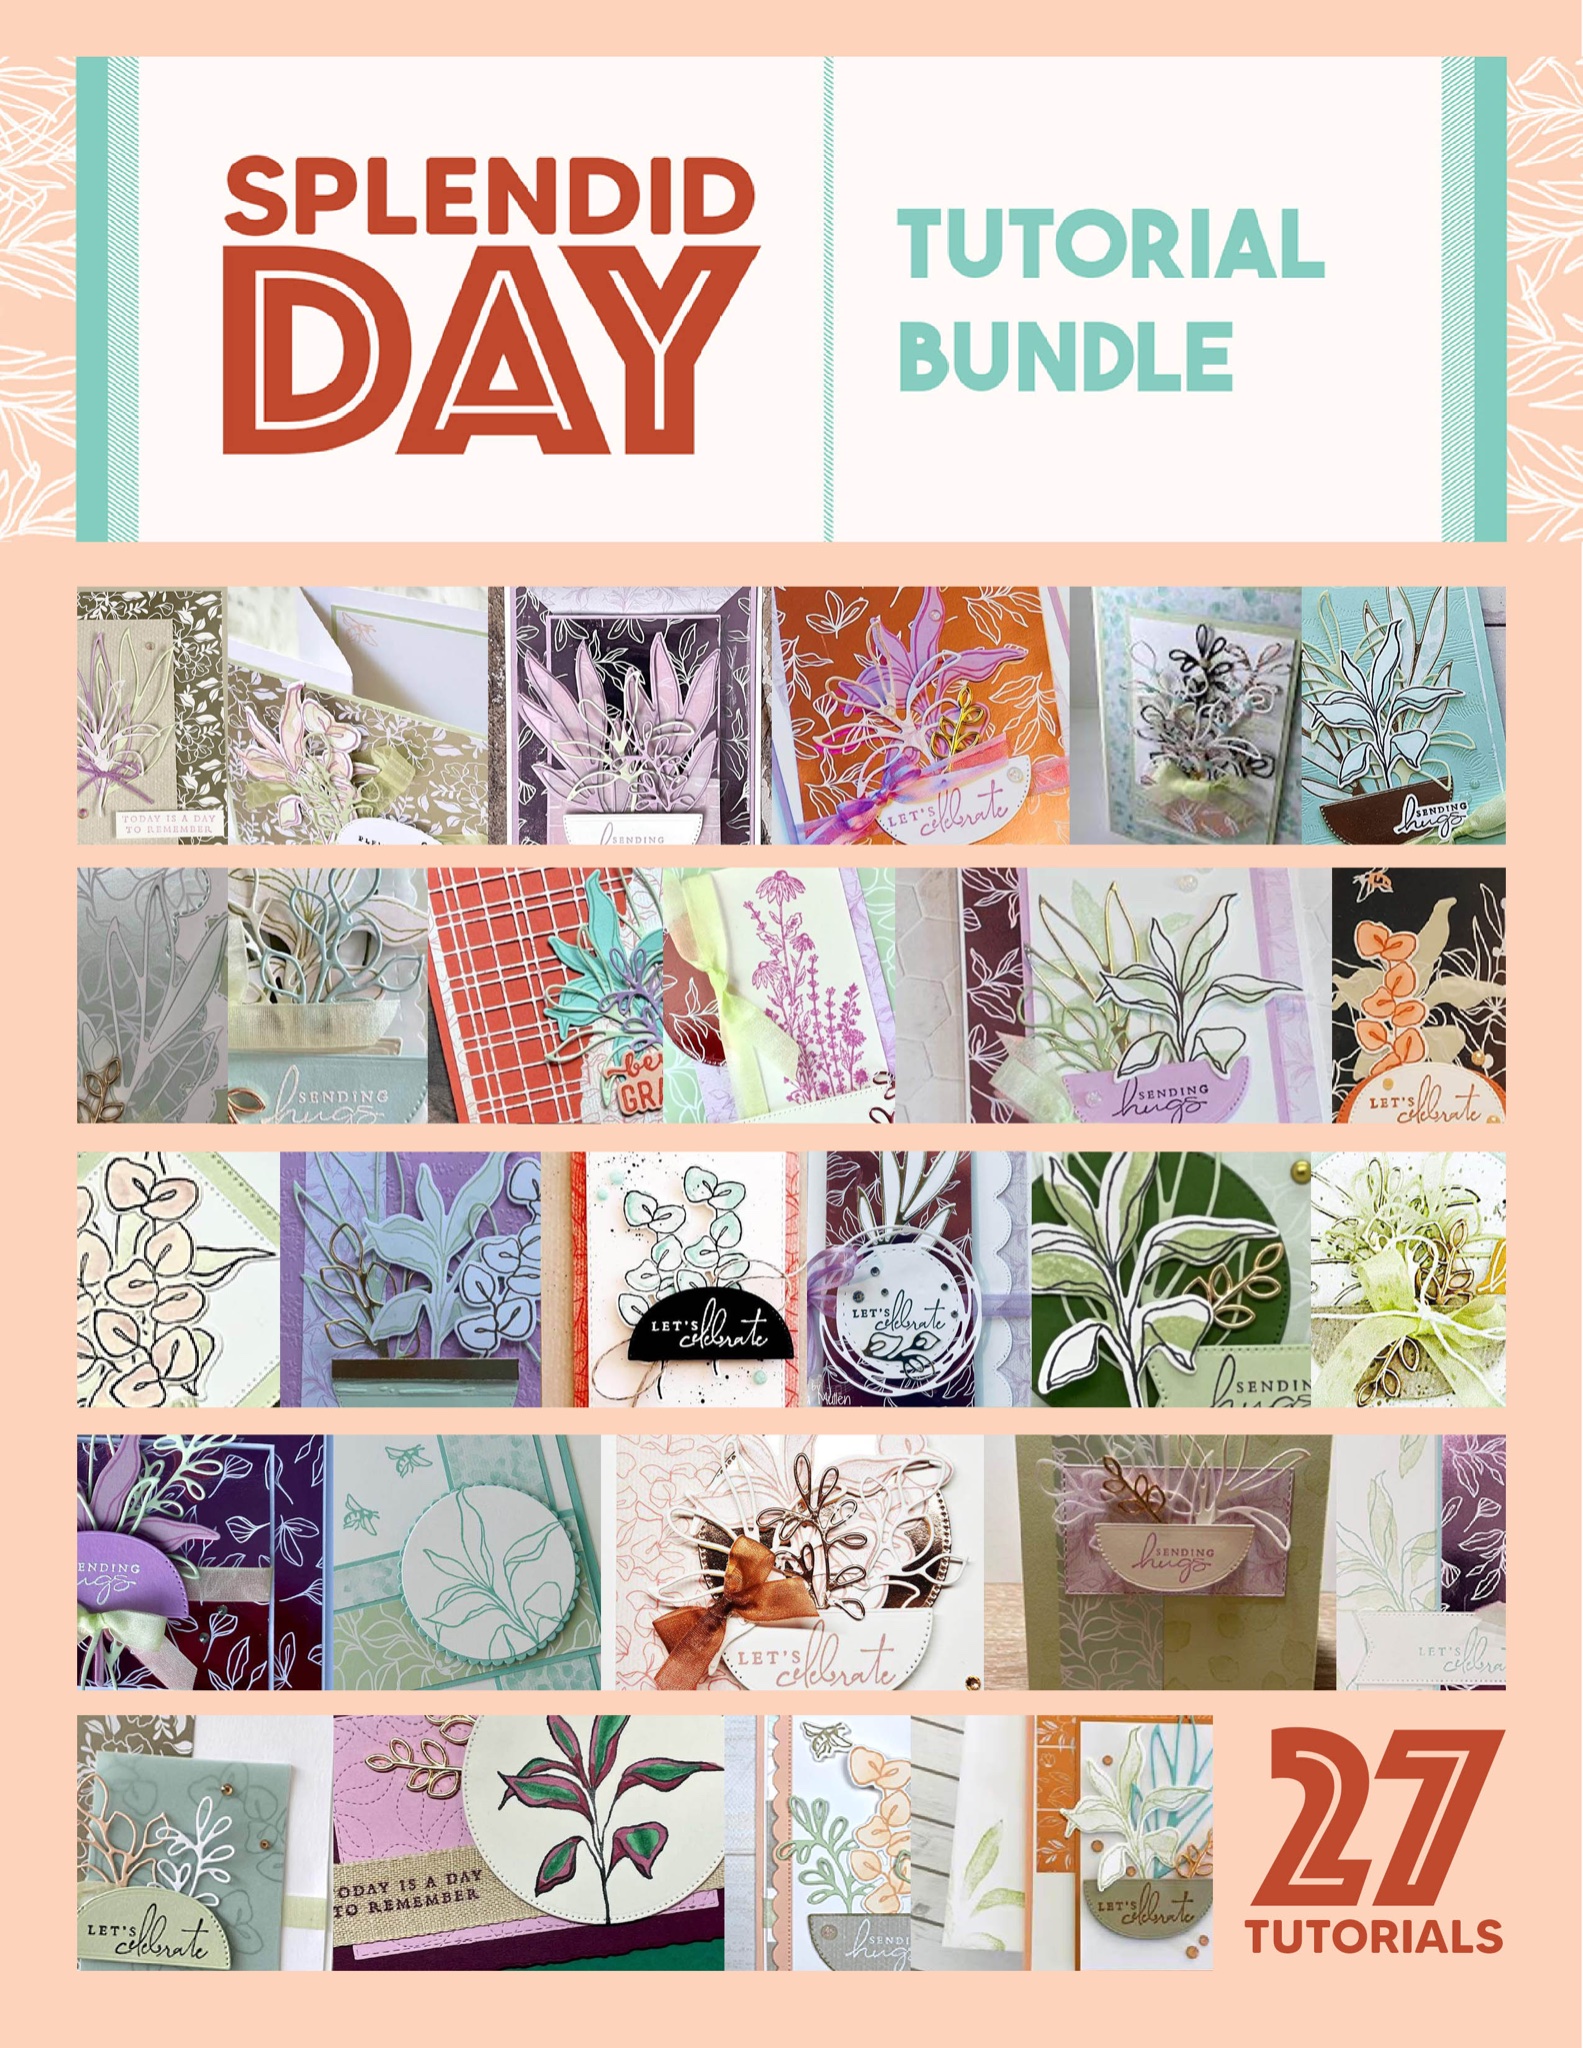

Visit my Tutorial Page HERE for more information, or visit the top of this page and click the link.
_______________________________

Subscribe to my newsletter HERE

My DECEMBER 2022 Host Code: GD9ZHCBB . When you spend over $40 in my store, you will receive a handmade card and a FREE gift from me.

If you would like to purchase any of these supplies, please click here

Please email me if you would like a copy of the 2022-2023 Annual Catalogue or the July-Dec 2022 Mini Catalogue.

Click to JOIN my team

If you would like regular updates from me, click my newsletter link here.

Follow me on social media via FacebookInstagram and Pinterest.

Hope you are getting some crafty time today, chat soon!

Product List: 
Read more »
Annie A
0 Comments
Artisan Design Team - November 2022 - Christmas Scottie

Artisan Design Team - November 2022 - Christmas Scottie


Hello and welcome to my blog! Today I am sharing my November monthly showcase projects for the Stampin' Up!® Artisan Design Team! 

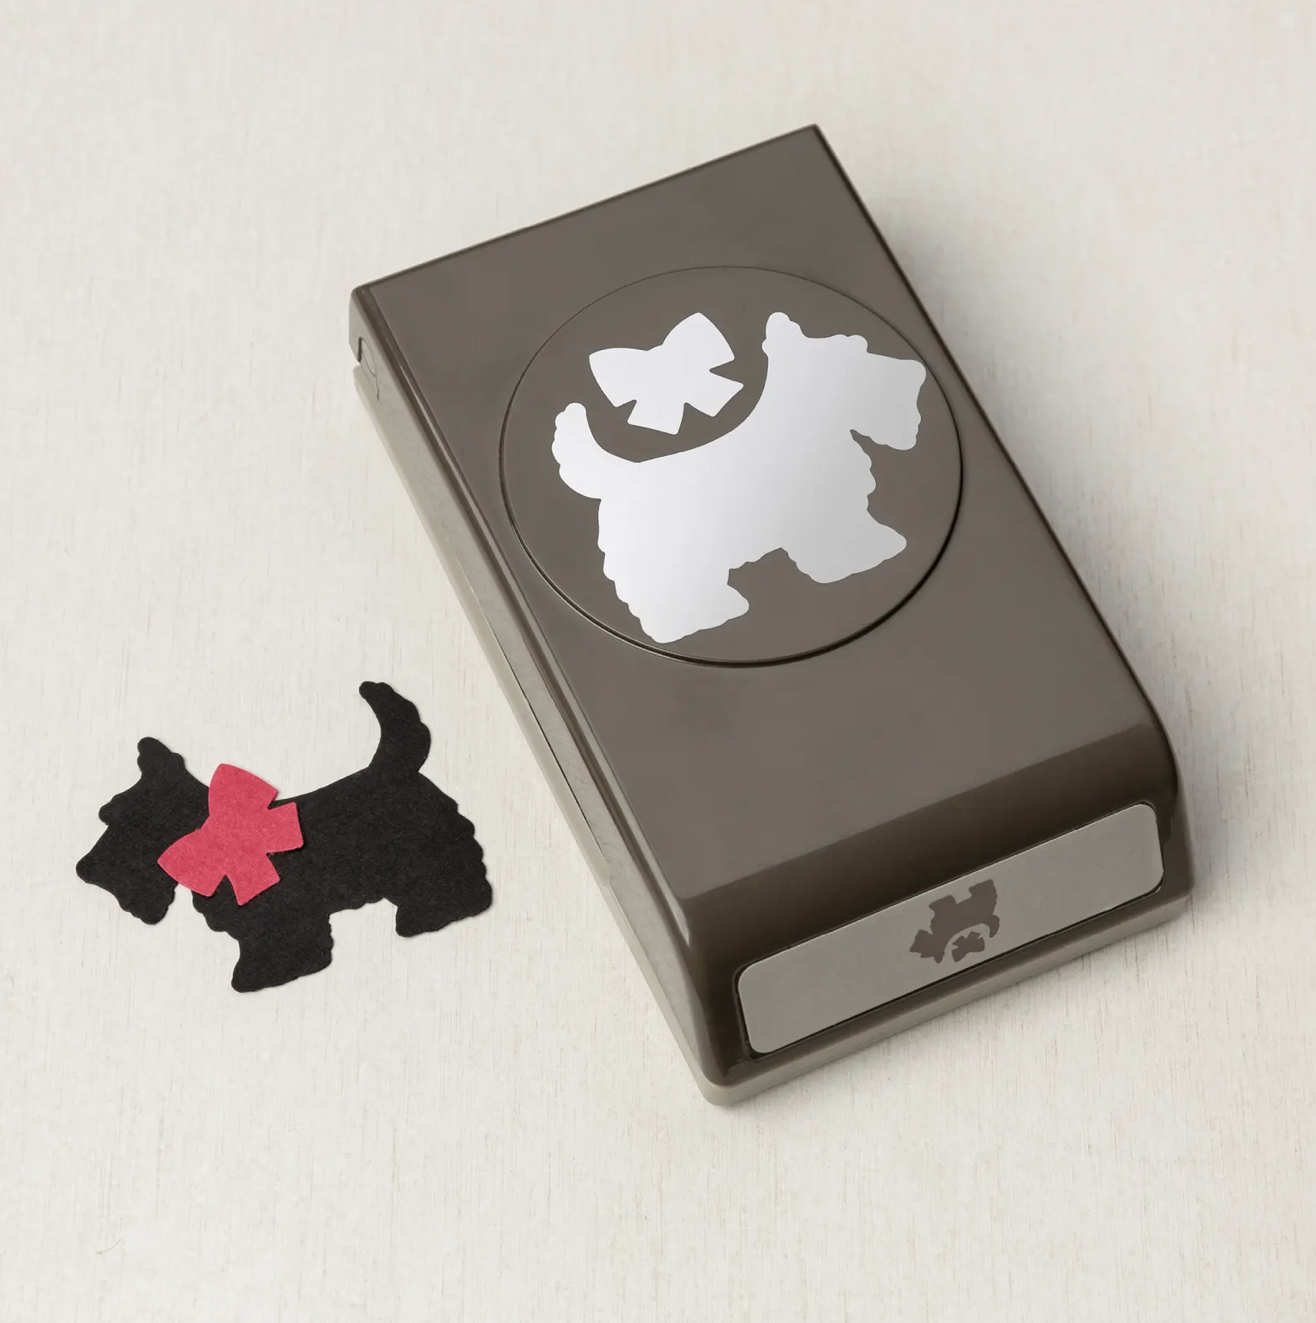
For this month's projects, I was asked to use products from the Stampin' Up!® 2022-2023 Mini Catalogue, the "Christmas Scottie" Bundle which includes the Christmas Scottie Stamp Set and Scottie Dog Punch. Don't forget to visit the Stampin' Up!® Corporate Facebook Page (here) or the Stampin' Up Official Instagram page (here) to see what the other Artisan Team Members have created with this set. 


Here is the Christmas Scottie Bundle:


Christmas Scottie Stamp Set:

The Scottie Dog Punch:


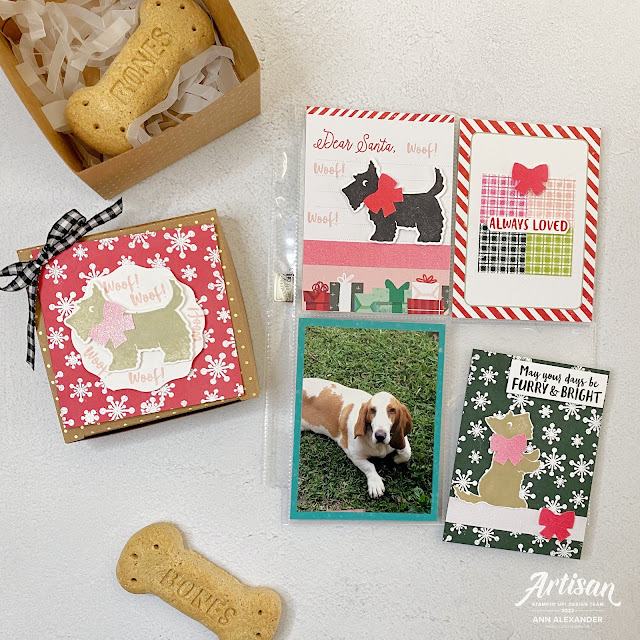
Christmas Scottie Memories and More 


Instructions: (this photo shows an extra 3" x 4" card created for this project)

- These pocket page cards were created using the Christmas Scottie stamp set, either stamped or embossed. There were combined with the Scottie Dog Punch, Santa Express Memories & More Card Pack, Real Red & White Glimmer Paper and 2022-2024 In Colour 6" x 6" Glimmer Paper. Inks used were Evening Evergreen, Granny Apple Green, Sweet Sorbet, Polished Pink and Blushing Bride with Versamark and White Stampin' Emboss Powder for the embossing.

TIPS: 

- Use the ombré colours from the 2022-2024 In Colour 6" x 6" Glimmer Paper to create multicoloured bows from one sheet of Glimmer paper. 
- Use the check pattern stamp to create your own pattern, which in this case I used to create a present box.

Woof, Woof Scalloped Kraft Treat Box


Instructions:

- Use a Sweet Sorbet card base cut down to 6 1/2" x 3 1/4" and fold in half to create a square 3 1/4" card. Stamp the snowflakes using Versamark ink and heat emboss with White Stampin' Emboss Powder. 

- Stamp the Scottie dog with Crumb Cake ink onto Basic White and punch out. Use the Decorative Circle Punch to punch out a label from Basic White and stamp "Woof" from the Christmas Scottie stamp set with Blushing Bride ink onto it. Layer with the Scottie Dog. and attach to the card base.

- Tie a bow using the Black & White Gingham Ribbon and adhere to the corner of the card. Adhere the card to the top of a Scalloped Kraft Treat Box. 

TIP:

- Cut down card to create little notecards to suit the occasion.
__________________________________

I have a new tutorial bundle available this month. The November 2022 Create With Us Tutorial Bundle features 15 tutorials from Stampin' Up!® designers from around the world and this month we have all created projects using Heat Embossing Techniques. 


Visit my Tutorial Page HERE to purchase this bundle.
____________________

I also have a tutorial bundle available highlighting the Splendid Day Suite Collection containing 27 Tutorials from myself and demonstrators from all over the world. All tutorials contain measurements in both Imperial and Metric.


Visit my Tutorial Page HERE for more information, or visit the top of this page and click the link.
_______________________________

Subscribe to my newsletter HERE

My NOVEMBER 2022 Host Code: 34RWU93W . When you spend over $40 in my store, you will receive a handmade card and a FREE gift from me.

If you would like to purchase any of these supplies, please click here

Please email me if you would like a copy of the 2022-2023 Annual Catalogue or the July-Dec 2022 Mini Catalogue.

Click to JOIN my team

If you would like regular updates from me, click my newsletter link here.

Follow me on social media via FacebookInstagram and Pinterest.

Hope you are getting some crafty time today, chat soon!

Product List: 
Read more »
Annie A
0 Comments
Artisan Design Team - October 2022 - Sweetest Christmas Suite Collection

Artisan Design Team - October 2022 - Sweetest Christmas Suite Collection


Hello and welcome to my blog! Today I am sharing my October monthly showcase projects for the Stampin' Up!® Artisan Design Team! 

For this month's projects, I was asked to use products from the Stampin' Up!® 2022-2023 Mini Catalogue, the "Sweetest Christmas " Suite Collection which includes the Sweet Candy Canes Stamp Set, Candy Canes Dies, Christmas Banners Stamp Set, Christmas Banner Dies, Sweetest Christmas DSP, Real Red & White Glimmer Paper, Real Red & Garden Green Ribbon Combo Pack and Adhesive Backed Seasonal Sequins. This is such a wonderful collection and filled with so many things to make your your Christmas crafting easy. I hope that the projects I have made inspire you to create something using this lovely collection! Don't forget to visit the Stampin' Up!® Corporate Facebook Page (here) or the Stampin' Up Official Instagram page (here) to see what the other Artisan Team Members have created with this set. 


Here is the Sweetest Christmas Suite Collection:


Here is the Sweet Candy Canes Bundle:


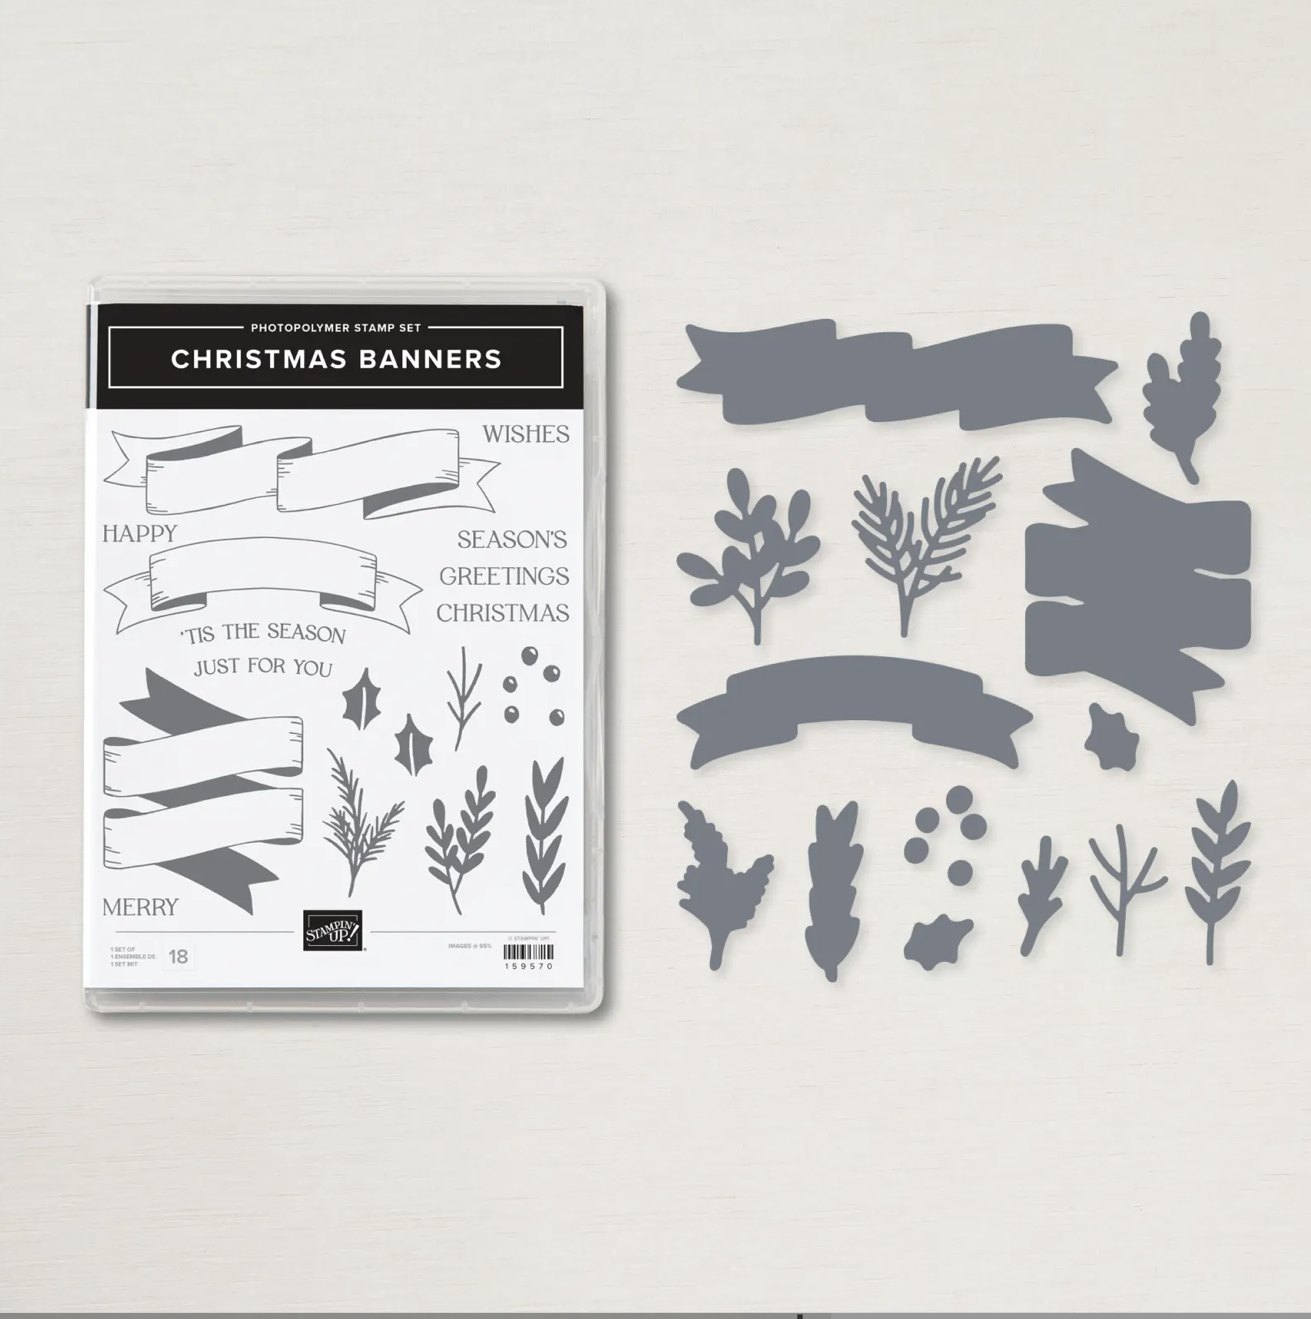
Here is the Christmas Banners Bundle:


'Tis The Season 


Instructions:

- Use a Basic White card base layered with Sweet Sorbet. Die cut a piece of Basic White with the diagonal die from Candy Canes Dies. Mat the back of this piece with Real Red Glimmer Paper and fill back in some of the Basic White die cut pieces back into the diagonal piece.

- Stamp multiple leaves from the Christmas Banners stamp set using Garden Green ink on Basic White and use the Christmas Banners Dies to cut. Adhere to the front of the card and use the Adhesive-Backed Seasonal Sequins to create the appearance of berries.

- Stamp the sentiment from the Christmas Banners set onto Basic White using Garden Green ink. Die cut using the Christmas Banners Dies. Die cut another piece using the Sweet Sorbet and back the main banner.

TIPS: 

- Use the colours of the DSP to ensure pieces from the whole set coordinate with each other. 
- Insert some of the die cut pieces back into the die cut diagonal panel to add interest.


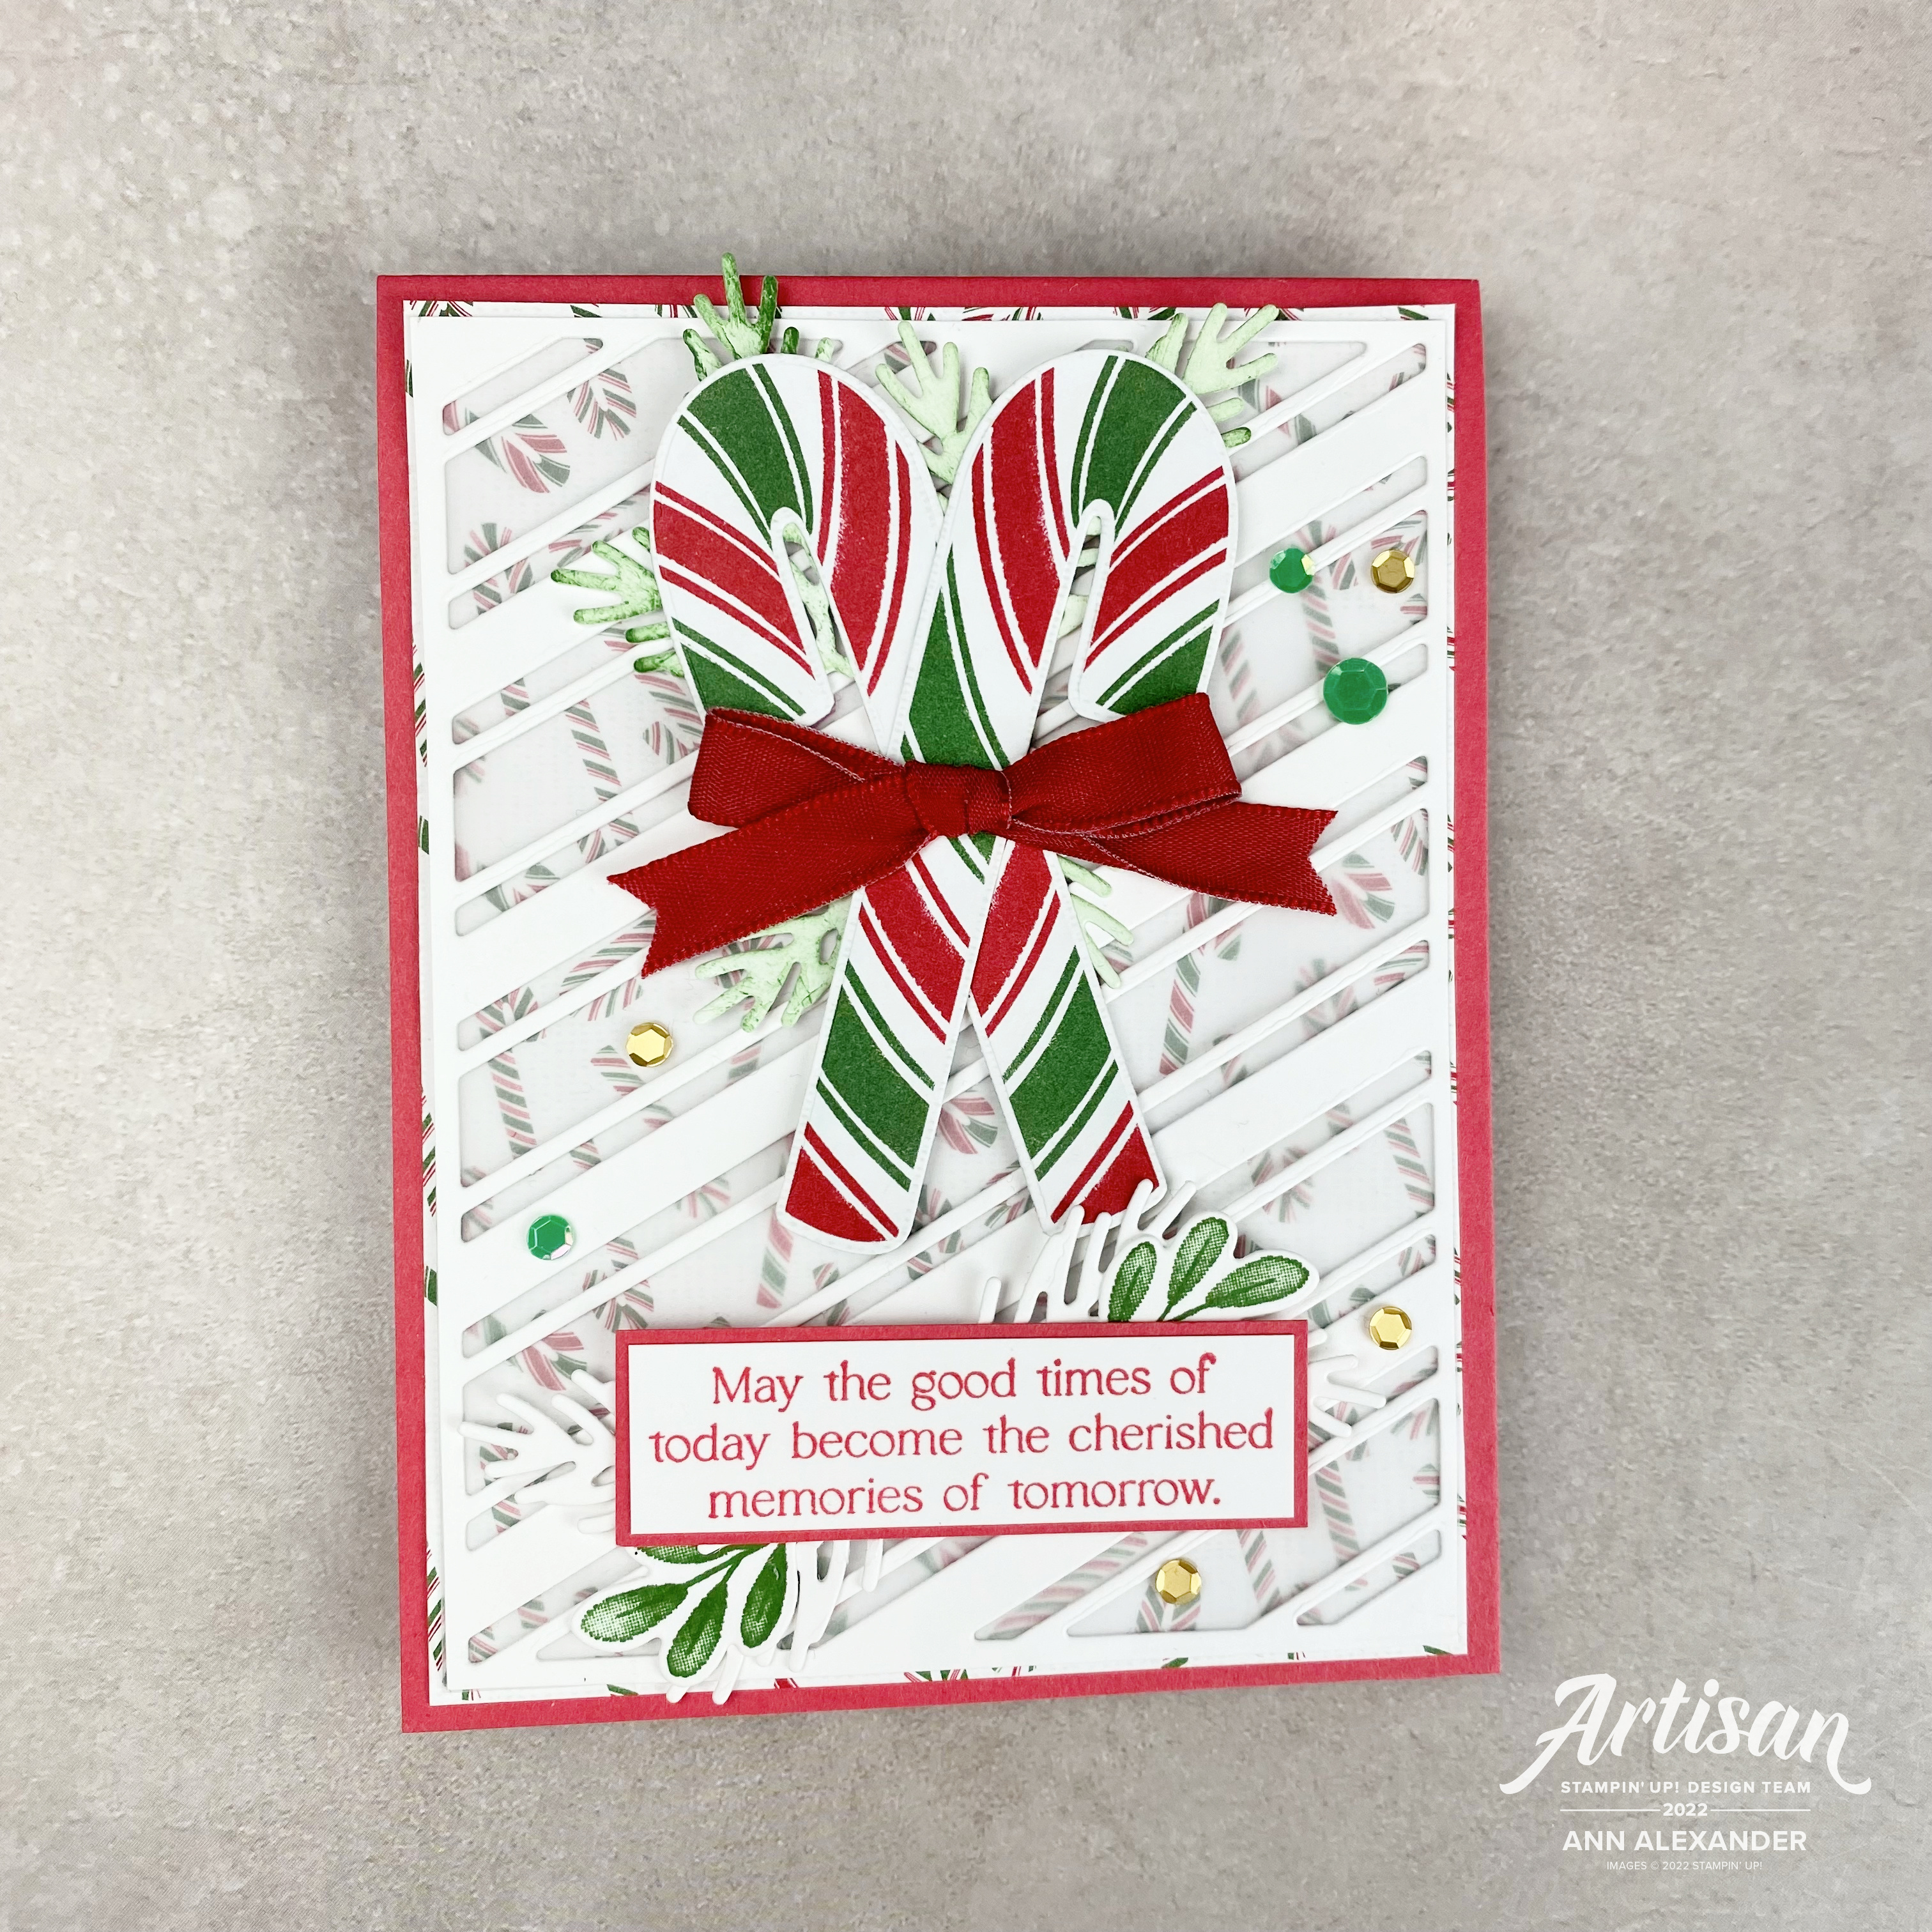
May The Good Times


Instructions:

- Use a Sweet Sorbet card base layered with a piece of the Sweetest Christmas DSP. Die cut a piece of Basic White with the diagonal die from Candy Canes Dies. Mat the back of this piece with Vellum to tone down the DSP. 

- Stamp leaves from the Christmas Banners stamp set using Garden Green ink on Basic White and use the Christmas Banners Dies to cut. Die cut some additional pieces of branches from Basic White card using the same dies. Apply Garden Green ink with a Blending Brush to some of the die cut pieces. Use the Candy Canes Dies to die cut some of the Candy Canes from the DSP and adhere and use the Adhesive-Backed Seasonal Sequins to decorate.

- Stamp the sentiment from the Candy Canes stamp set onto Basic White using Sweet Sorbet ink and mat onto a piece of Sweet Sorbet card. Tie a bow using the Real Red Ribbon and adhere to the Candy Canes.

TIP:

- Use Vellum to tone down busy Designer Series Paper.
- Use a Blending Brush to add a soft layer of colour to die cut pieces.

Just For You


Instructions:

- Use a Stars Treat Bag and adhere a piece of the Red Glimmer Paper inside the bag to back the open stars.

- Stamp images from the Christmas Banners Set onto Basic White using Garden Green ink and die cut. Die cut the Candy Cane from the Sweetest Christmas DSP using the Candy Canes Dies. Die cut more leaf/branch pieces from Basic White and use a Blending Brush to apply Pool Party ink to these die cut pieces. Arrange all the stamped images and die cut pieces and adhere to the front to the bag.

- Stamp the sentiment from the Christmas Banners set onto Basic White using Garden Green ink. Die cut using the Christmas Banners Dies. Die cut another piece using Sweet Sorbet card and back the main banner. Tie a fancy bow using the Garden Green Ribbon and adhere to the Candy Cane and add some Adhesive-Backed Seasonal Sequins to decorate.

TIP:

- Use the elements from this collection on packaging like treat bags to spruce up your Christmas Gift Giving.
- Add a fancy bow to a project to add a special element. 
__________________________________

I have a new tutorial bundle available this month. The October 2022 Create With Us Tutorial Bundle features 15 tutorials from Stampin' Up!® designers from around the world and this month we have all created Seasonal Fun Folds. I have seen all the projects and they are spectacular. You won't want to miss this bundle. 

Visit my Tutorial Page HERE to purchase this bundle.
____________________

I also have a tutorial bundle available highlighting the Splendid Day Suite Collection containing 27 Tutorials from myself and demonstrators from all over the world. All tutorials contain measurements in both Imperial and Metric.


Visit my Tutorial Page HERE for more information, or visit the top of this page and click the link.
_______________________________

Subscribe to my newsletter HERE

My OCTOBER 2022 Host Code: SM6GNXDM . When you spend over $40 in my store, you will receive a handmade card and a FREE gift from me.

If you would like to purchase any of these supplies, please click here

Please email me if you would like a copy of the 2022-2023 Annual Catalogue or the July-Dec 2022 Mini Catalogue.

Click to JOIN my team

If you would like regular updates from me, click my newsletter link here.

Follow me on social media via FacebookInstagram and Pinterest.

Hope you are getting some crafty time today, chat soon! 


Read more »
Annie A
0 Comments
I am an Independent Stampin' Up! Demonstrator