Showing posts with label Casually Crafting. Show all posts
Thank You - Cup of Tea - Casually Crafting Design Team Blog Hop - May 2022

Thank You - Cup of Tea - Casually Crafting Design Team Blog Hop - May 2022


Hello and welcome back. Today I have a card for the Casually Crafting Design Team May 2022 Blog Hop. This month we have a Colour Challenge using the brand new 2022-2024 In Colours from Stampin' Up!®. 


So who are we?

The Casually Crafting Design Team are a group of Independent Stampin' Up!® demonstrators from around the world that want to share our love of crafting with you all. We all love simple and easy cards, so you will see cards that are ideally suited for beginners and casual crafters. Sometimes we will also be showing stepped up versions for the more avid crafter.

We will sharing what we love every 3rd Saturday of the month. Make sure to check out the rest of the Design Team's creative projects using the links below. 

For this month, I decided to use the Cup of Tea stamp set with the coordinating Tea Boutique DSP, Starry Sky Metallic Woven Ribbon and 2022-2024 In Colour Matte Decorative Dots.

Instructions:

- Use a piece of Starry Sky card A4/Letter cut in half lengthwise and folded. Mat with a piece of Tea Boutique DSP.

- Use a smaller piece of Basic White and apply Tahitian Tide ink with a Blending Brush. Stamp the cup, leaves and flowers from the Cup of Tea stamp set in Sweet Sorbet, Parakeet Party, Tahitian Tide and Orchid Oasis respectively. Fussy cut out and adhere to the Basic White card. 

- Stamp a sentiment from the Cup of Tea set using Versamark ink onto Orchid Oasis card and heat emboss with White Stampin' Emboss Powder. Adhere the sentiment to the teacup on the card. Add some 2022-2024 In Colour Matte Decorative Dots to the flower centres and to the card. Tie a piece of Starry Sky Metallic Woven Ribbon to the Basic White card and then adhere to the card base.

Measurements:

- Starry Sky card base: A4/Letter cut in half lengthwise and folded in half.

- Tea Boutique DSP: A4 5 5/8" x 3 7/8"/ 14.4 cm x 10 cm or Letter 4" x 5 1/4"

Basic White card: A4 5 1/8" x 3 3/8"/ 13.4 cm x 9 cm or Letter 3 1/2" x 4 3/4"

You may be starting here or may have come from another blog - either way you can find the blog link list below, so that you can see every blog post and idea today.

I hope you like this card today. Have you had a chance to play with the Cup of Tea Bundle yet? Please leave me a comment to let me know!

BLOG LINKS:

** Please email me if you have any questions.

Subscribe to my newsletter HERE

My MAY 2022 Host Code: 3ZVTKUY7 . When you spend over $40 in my store, you will receive a handmade card and a FREE gift from me.

If you would like to purchase any of these supplies, please click here

Please email me if you would like a copy of the upcoming 2022-2023 Annual Catalogue or the Jan-June 2022 Mini Catalogue.

Click to JOIN my team

If you would like regular updates from me, click my newsletter link here.

Follow me on social media via FacebookInstagram and Pinterest.

Hope you are getting some crafty time today, chat soon!

Product List:
Read more »
Annie A
6 Comments
Thank you - Blessings of Home - Casually Crafting Design Team December Blog Hop 2021

Thank you - Blessings of Home - Casually Crafting Design Team December Blog Hop 2021


Hello and welcome back. Today I have a card for the Casually Crafting Design Team December 2021 Blog Hop. This month we have a Tic Tac Toe Challenge, where you select a row in any direction. I decided to go diagonal this month and selected "White, Vellum and Gold"


So who are we?

The Casually Crafting Design Team are a group of Independent Stampin' Up!® demonstrators from around the world that want to share our love of crafting with you all. We all love simple and easy cards, so you will see cards that are ideally suited for beginners and casual crafters. Sometimes we will also be showing stepped up versions for the more avid crafter.

We will sharing what we love every 3rd Saturday of the month. Make sure to check out the rest of the Design Team's creative projects using the links below. 

For this month, I decided to use the Blessings of Home stamp set, Expressions in Ink Ephemera Pack, Gold Embossing Powder and Vellum to create my card.

Instructions:

- Use a piece of Basic White card A4/Letter cut in half and folded. Use a smaller piece of Basic White card and use a scoring board and bone folder to score lines every 1/2"/ 1.3cm to add interest to the piece. Tie a piece of Gold Simply Elegant Trim around the card and tie a bow at the side of the card. Attach this card to the card base with Stampin' Dimensionals.

- Use a piece of Vellum, and stamp the main floral image from the Blessings of Home set using Versamark Ink. Heat emboss with Gold Stampin' Emboss Powder and then fussy cut the image out. Adhere to the card with Mini Stampin' Dimensionals being careful to add the adhesive in places where it will not be visible through the vellum. Use some gold pieces of Expressions in Ink Ephemera Pack to add more detail.

- Stamp a sentiment from the Blessings of Home set (a new set coming with the brand new January-June 2022 Mini Catalogue next month) using using Versamark ink onto Blushing Bride card and heat emboss with White Stampin' Emboss Powder. Adhere the sentiment to the card. Use a Smoky Slate Stampin' Write marker to add some dots in the background to give more interest. Finally add some Brushed Metallic Adhesive Backed Dots to the card. 

Measurements:

- Basic White card base: A4/Letter cut in half lengthwise and folded in half.

- Basic White: A4 5 1/4" x 3 1/2"/ 13.7 cm x 9.3 cm or Letter 3 5/8" x 4 7/8"

You may be starting here or may have come from another blog - either way you can find the blog link list below, so that you can see every blog post and idea today.

I hope you like this card today. Have you had a chance to play with the Blessings of Home stamp set. Please leave me a comment to let me know!

BLOG LINKS:


** Please email me if you have any questions

Don't forget to subscribe to my newsletter.

Also don't forget to visit my Tutorial page for my brand new August-September 2021 Sale-a-bration Mega Tutorial Bundle which contains 39 tutorials. Even though Sale-a-bration has finished, there are so many inspiring tutorials in the bundle.I also have the Dandy Garden Mega Tutorial Bundle which contains 62 tutorials for Dragonfly and Dandy Garden inspiration from Demonstrators all over the world and the  Love You Always - Mosaic Card Tutorial available as a tutorial too which is a perfect tutorial for using Scrappy Strips! 

Read more »
Annie A
2 Comments
Happy Wishes - Words of Cheer - Casually Crafting Design Team Blog Hop - November 2021

Happy Wishes - Words of Cheer - Casually Crafting Design Team Blog Hop - November 2021


Hello and welcome back. Today I have a card for the Casually Crafting Design Team November 2021 Blog Hop. This month we have a Colour Challenge using Basic Black, Basic Gray and Basic White. 


So who are we?

The Casually Crafting Design Team are a group of Independent Stampin' Up!® demonstrators from around the world that want to share our love of crafting with you all. We all love simple and easy cards, so you will see cards that are ideally suited for beginners and casual crafters. Sometimes we will also be showing stepped up versions for the more avid crafter.

We will sharing what we love every 3rd Saturday of the month. Make sure to check out the rest of the Design Team's creative projects using the links below. 

For this month, I decided to use the Words of Cheer stamp set and combined it with a piece of coloured Paper Lattice as well as some heat embossing.

Instructions:

- Use a piece of Basic White card A4/Letter cut in half and folded. Stamp the large floral image  from the Words of Cheer stamp set using Versamark Ink and heat emboss with White Stampin' Emboss Powder. Stamp this image multiple times over the Basic White card. 

- Use a piece of Paper Lattice coloured with Basic Black Stampin' Blends. Splatter and dot Wink of Stella onto Basic Black card (same size as Paper Lattice) then adhere the lattice to the Basic Black card. Attach this to a piece of Basic Gray leaving a narrow border and adhere to the card. 

- Stamp the large floral image from the Words of Cheer set using using Tuxedo Black ink onto Basic White and use Basic Black Stampin' Blends to colour parts of the image. Fussy cut this image out and adhere to the Paper Lattice. Stamp a sentiment from the Words of Cheer set onto Basic Gray with Versamark Ink and heat emboss with White Stampin' Emboss Powder. Adhere to the card. Add some Classic Matte Dots to the card. 

Measurements:

- Basic White A4/Letter cut in half lengthwise and folded in half.

- Basic Gray A4 5" x 3 3/8"/ 12.6 cm x 8.5 cm or Letter 3 3/8" x 5"

- Basic Black/ Paper LatticeA4 4 7/8 " x 3 1/4"/ 12.3 cm x 8.2 cm or Letter 3 1/4" x 4 7/8"

You may be starting here or may have come from another blog - either way you can find the blog link list below, so that you can see every blog post and idea today.

I hope you like this card today. Please leave me a comment to let me know!

BLOG LINKS:
Please email me if you have any questions!

My NOVEMBER 2021 Host Code: GPPFNQZ7 . When you spend over $40 in my store, you will receive a handmade card and a FREE gift from me.

If you would like to purchase any of these supplies, please click here

Please email me if you would like a copy of the brand new 2021-2022 Annual Catalogue or the Aug-Dec 2021 Mini Catalogue.

Click to JOIN my team. 

If you would like regular updates from me, click my blog link here, and my newsletter link here.

Follow me on social media via FacebookInstagram and Pinterest.

Hope you are getting some crafty time today, chat soon!

Don't forget that if you join Stampin' Up!® from 4th November till 30th November, when you order your custom starter kit, you will be able to redeem $235 AUD for only $130 AUD. Click to JOIN my team, if you would like to enjoy this fantastic new promotion.


Products used (available in Jan-June 2022 Mini Catalogue):
- Classic Matte Dots

Product List
Read more »
Annie A
12 Comments
I miss you - Blackberry Beauty - Casually Crafting Design Team Blog Hop - October 2021

I miss you - Blackberry Beauty - Casually Crafting Design Team Blog Hop - October 2021


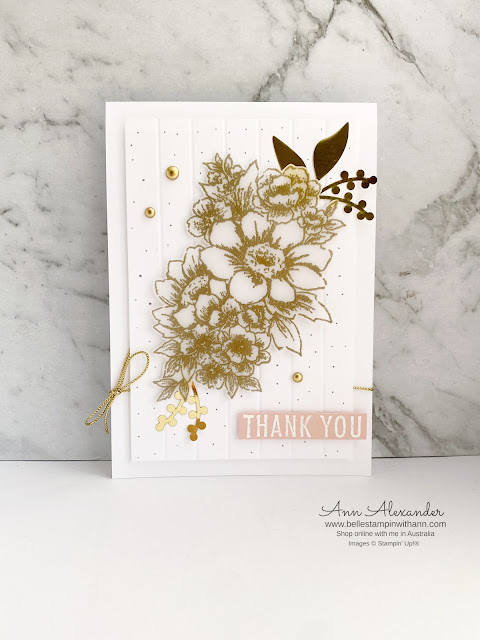
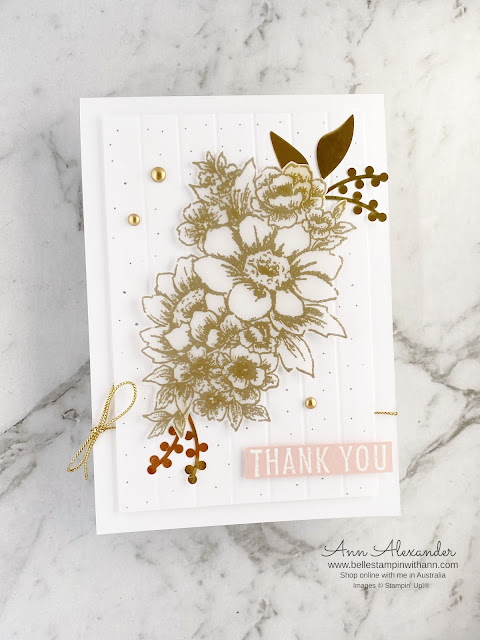
Hello and welcome back. Today I have a card for the Casually Crafting Design Team October 2021 Blog Hop. This month we have a Sketch Challenge. Now I will admit I was a little stumped initially when I saw this sketch but when I looked at the Blackberry Beauty Designer Series Papers, I realised it would fit perfectly with this sketch. It also gave me the opportunity to use the owl in the Blackberry Beauty Ephemera Pack which I had been saving for the perfect project.


So who are we?

The Casually Crafting Design Team are a group of Independent Stampin' Up!® demonstrators from around the world that want to share our love of crafting with you all. We all love simple and easy cards, so you will see cards that are ideally suited for beginners and casual crafters. Sometimes we will also be showing stepped up versions for the more avid crafter.

We will sharing what we love every 3rd Saturday of the month. Make sure to check out the rest of the Design Team's creative projects using the links below. 

For this month, I decided to share a card using the Blackberry Beauty Designer Series Papers and Ephemera Pack, combined with the Gold Paper (from the Gold & Rose Gold Metallic Specialty Paper pack), Simply Elegant Trim and a sentiment from the Art Gallery stamp set . 

Instructions:

- Use a piece of Early Espresso card A4/Letter cut in half and folded. Mat with a smaller piece of Gold Metallic Specialty card and attach with Stampin' Dimensionals. Layer two coordinating pieces of the Blackberry Beauty DSP attaching them with Liquid Glue. 

- Cut a strip of Gold Metallic Specialty paper and mat with a strip of Blackberry Beauty DSP. Attach the strips to the card using Stampin' Dimensionals. Attach the owl from the Blackberry Beauty Ephemera Pack with Stampin' Dimensionals.  

- Stamp the sentiment from the Art Gallery stamp set using Versamark Ink onto a piece of Basic White. Heat emboss with Gold Stampin' Emboss Powder. Attach to a strip of Gold Metallic Specialty Paper and then to a label from the Blackberry Beauty Ephemera Pack. Add some Gold Simply Elegant Trim to the card and attach the sentiment over the top with Stampin' Dimensionals.  Add some Genial Gems to finish the card.

Measurements:

- Early Espresso base A4/Letter cut in half  and folded

- Gold Metallic Specialty Paper: A4
 5 5/8" x 3 7/8"/ 14.4 cm x 10 cm or Letter 4" x 5 1/4"

Blackberry Beauty DSP Layer 1A4 5 1/2" x 3 3/4"/ 14.2 cm x 9.8 cm or Letter 3 7/8" x 5 1/8"

Blackberry Beauty DSP Layer 2: A4 5 3/8" x 3 5/8"/ 13.9 x 9.5 cm or Letter 3 3/4" x 5"

Gold Metallic Specialty Paper Strip: A4 5 3/8" x 7/8"/ 13.9 x 2.2 cm or Letter 7/8" x 5"

Blackberry Beauty DSP Strip: A4 5 3/8" x 5/8"/ 13.9 x 1.7 cm or Letter 5/8" x 5"


You may be starting here or may have come from another blog - either way you can find the blog link list below, so that you can see every blog post and idea today.

I hope you like this card today. Have you had a chance to play with the Blackberry Beauty products?  Please leave me a comment to let me know!

BLOG LINKS:

** Please email me if you have any questions.

Don't forget to visit my Tutorial page for my brand new August-September 2021 Sale-a-bration Mega Tutorial Bundle which contains 39 tutorials and Dandy Garden Mega Tutorial Bundle which contains 62 tutorials for Dragonfly and Dandy Garden inspiration from Demonstrators all over the world. I also have my Love You Always - Mosaic Card Tutorial available as a tutorial too.

Read more »
Annie A
16 Comments
Season's Greetings - Words of Cheer - Casually Crafting Design Team Blog Hop September 2021

Season's Greetings - Words of Cheer - Casually Crafting Design Team Blog Hop September 2021


Hello and welcome back. Today I have a card for the Casually Crafting Design Team September 2021 Blog Hop. This month we have a Tic-Tac-Toe Challenge. I selected the first column for with "Christmas, Foliage & Green" for my card today.


So who are we?

The Casually Crafting Design Team are a group of Independent Stampin' Up!® demonstrators from around the world that want to share our love of crafting with you all. We all love simple and easy cards, so you will see cards that are ideally suited for beginners and casual crafters. Sometimes we will also be showing stepped up versions for the more avid crafter.

We will sharing what we love every 3rd Saturday of the month. Make sure to check out the rest of the Design Team's creative projects using the links below. 

For this month, I decided to share a card using the Words of Cheer Stamp Set. The background was created using stamped images from this set which were heat embossed with Gold and Silver Embossing Powder. The main floral image was fussy cut and coloured with Stampin' Blends.

Instructions:

- Use a piece of Basic White card A4/Letter cut in half lengthwise and folded. Use a smaller piece of Soft Succulent card and attach with Stampin' Dimensionals.. 

- Stamp the leaves from the Words of Cheer using Versamark Ink onto a piece of Evening Evergreen. Heat emboss with Gold and Silver Stampin' Emboss Powder. Stamp the main floral image from this set onto a piece of Basic White using Tuxedo Ink. Fussy cut the image, although if you have a die cutting machine you could use the coordinating dies. Colour with Stampin' Blends (listed below). Attach the floral image to the card using Stampin' Dimensionals. 

- Cut a piece of Real Red Sheer Ribbon in half lengthwise. Use one of the cut pieces with a piece of Gold Simply Elegant Trim and tie into a double bow and attach to the card using a Mini Glue Dot.

- Stamp a sentiment from the Words of Cheer stamp set using Evening Evergreen ink onto strip of Basic White card. Cut the sentiment up to create two pieces and attach the sentiment to the card using Stampin' Dimensionals. Add some Wonderful Gems to the flowers and the card finish the card.

Measurements:

- Basic White base A4/Letter cut in half lengthwise and folded

- Soft Succulent: A4
 5 5/8" x 3 7/8"/ 14.4 cm x 10 cm or Letter 4" x 5 1/4"

Evening Evergreen: A4 5 3/8" x 3 5/8"/ 13.9 x 9.5 cm or Letter 3 3/4" x 5"


You may be starting here or may have come from another blog - either way you can find the blog link list below, so that you can see every blog post and idea today.

I hope you like this card today. Have you created a card just using fussy cut images before? Please leave me a comment to let me know!

BLOG LINKS:

** Please email me if you have any questions.

Don't forget to subscribe to my newsletter as I will have dimensions for this card. 

Also don't forget to visit my Tutorial page for my brand new August-September 2021 Sale-a-bration Mega Tutorial Bundle which contains 39 tutorials and Dandy Garden Mega Tutorial Bundle which contains 62 tutorials for Dragonfly and Dandy Garden inspiration from Demonstrators all over the world. I also have my Love You Always - Mosaic Card Tutorial available as a tutorial too.

Read more »
Annie A
6 Comments
Congratulations - Inspired Thoughts Stamp Set & Beautifully Penned DSP - Casually Crafting Design Team Blog Hop August 2021

Congratulations - Inspired Thoughts Stamp Set & Beautifully Penned DSP - Casually Crafting Design Team Blog Hop August 2021


Hello and welcome back. Today I have a card for the Casually Crafting Design Team August 2021 Blog Hop. This month we have a colour challenge using Pear Pizzazz, Daffodil Delight and Polished Pink. 


So who are we?

The Casually Crafting Design Team are a group of Independent Stampin' Up!® demonstrators from around the world that want to share our love of crafting with you all. We all love simple and easy cards, so you will see cards that are ideally suited for beginners and casual crafters. Sometimes we will also be showing stepped up versions for the more avid crafter.

We will sharing what we love every 3rd Saturday of the month. Make sure to check out the rest of the Design Team's creative projects using the links below. 

For this month, I decided to share a card using the Inspired Thoughts Stamp Set and Beautifully Penned Designer Series Paper (this is a Sale-a-bration item that coordinates beautifully with the Hand-Penned Petals Bundle).

The card was created using fussy cut images from the Beautifully Penned DSP with the sentiment as the only stamped image. The flowers were coloured with Stampin' Blends and the 'leaves' were punched pieces coloured with some ink blending. This is a perfect card for a beginner card maker as there was limited stamping, but it shows that fussy cut images can be just as effective as a stamped image. 

Instructions:

- Use a piece of Basic White card A4/Letter cut in half lengthwise and folded. Use a smaller piece of Gold striped Expressions in Ink  DSP and attach with Liquid Glue. 

- Fussy cut flowers from the Beautifully Penned DSP and colour with Stampin' Blends (Polished Pink & Daffodil Delight- the mix of colours creating orange at times). Blend Pear Pizzaz Ink onto a scrap piece of Basic White card and use the Sprig Punch to punch some leaves. Arrange the fussy cut flowers and leaves onto a piece of Vellum and adhere using Liquid Glue and Stampin' Dimensionals. Attach the Vellum to the card using Stampin' Seal under the areas covered by flowers to avoid the glue being visible.

- Stamp a sentiment from the Inspired Thoughts stamp set using Versamark ink onto Basic Black card and heat emboss with White Stampin' Emboss Powder. Attach the sentiment to the card using Stampin' Dimensionals. 

- Colour some Rhinestone Basic Jewels using the Polished Pink Stampin' Blends and adhere to the card.

Measurements:

- Basic White base A4/Letter cut in half lengthwise and folded

- Expressions in Ink DSP: A4 5 3/8" x 3 5/8"/ 13.9 x 9.5 cm or Letter 3 3/4" x 5"

Vellum: A4 5 1/8" x 3 3/8"/ 13.4 x 9 cm or Letter 3 1/2" x 4 3/4"


You may be starting here or may have come from another blog - either way you can find the blog link list below, so that you can see every blog post and idea today.

I hope you like this card today. Have you created a card just using fussy cut images before? Please leave me a comment to let me know!

BLOG LINKS:

** Please email me if you have any questions.

Make sure you subscribe to my newsletter. 

Don't forget to visit my Tutorial page for the Dandy Garden Mega Tutorial Bundle which contains 62 tutorials for Dragonfly and Dandy Garden inspiration from Demonstrators all over the world. I also have my Love You Always - Mosaic Card Tutorial available as a tutorial too.

Read more »
Annie A
6 Comments
I am an Independent Stampin' Up! Demonstrator