Showing posts with label Color & Contour. Show all posts
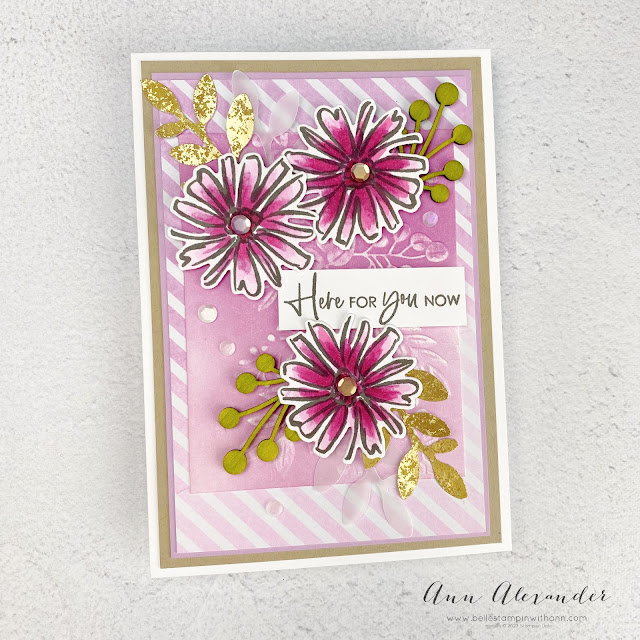
Here For You Know - Color & Contour - GDP416 Case the Designer Challenge

Here For You Know - Color & Contour - GDP416 Case the Designer Challenge


Hello and welcome back to my blog! Today's card is for Global Design Project's GDP416 Case the Designer Challenge . This week we are CASEing Kayla and her amazing colourful and detailed card. I used the general design and use of colour from Kayla's card as inspiration for my card today.

I used the Color & Contour stamp set, Scalloped Contours Dies, Bright & Beautiful Memories & More Card Pack, Elegant Eucalyptus Embossing Folder, Bough Punch, Textural Elements, Distressed Gold Specialty Paper, Stampin' Blends and Adhesive Backed Sequins Trio.


Instructions:

- Use Basic White for the card base and then layer with Crumb Cake card, Basic White card and then a card from the Bright & Beautiful Memories & More Card Pack.

- Use another piece of Basic White and apply Bubble Bath & Fresh Freesia ink with a Blending Brush. Emboss with the Elegant Eucalyptus Embossing Folder and then use sandpaper to sand back the raised areas to white and adhere.

- Stamp the flowers and sentiment from the Colour & Contour set onto Basic White with Pebbled Path ink and colour the flowers with Stampin' Blends (Bubble Bath, Berry Burst, Blackberry Bliss and Melon Mambo). 

Die cut the flowers using the Scalloped Contour Dies. Use a Lemon Lime Twist (dark) Stampin' Blend marker to colour the Textural Elements. Use the Bough Punch to punch out leaf pieces from the Distressed Gold Specialty Paper and White Vellum and arrange all the pieces onto the card. 

- Adhere the sentiment and finally add some Adhesive Backed Sequins Trio Berry Burst sequins to complete.

_____________________________

My OCTOBER 2023 Host Code: MVCSDJRC . When you spend over $40 in my store, you will receive a handmade card and a FREE gift from me.

If you would like to purchase any of these supplies, please click here

Please email me if you would like a copy of the 2023-2024 Annual Catalogue or the September - December 2023 Mini Catalogue.

Click to JOIN my team

Follow me on social media via FacebookInstagram and Pinterest.

Hope you are getting some crafty time today, chat soon! 
Read more »
Annie A
0 Comments
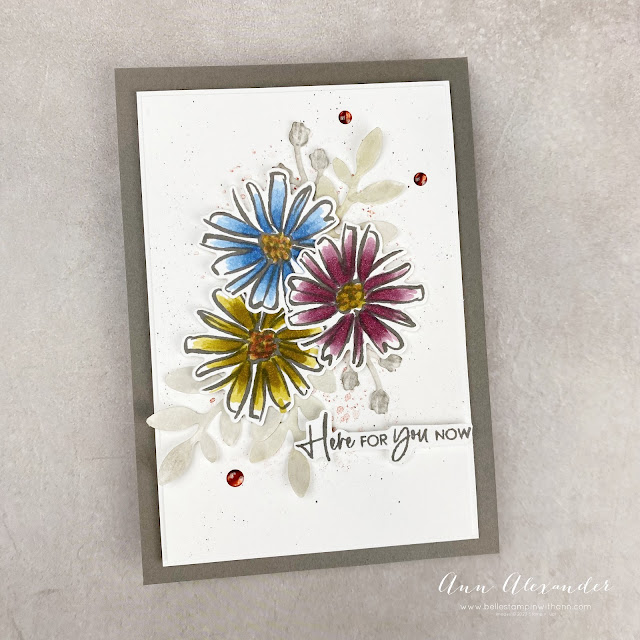
Here For You Now - Color and Contour - May 2023 Instahop

Here For You Now - Color and Contour - May 2023 Instahop


Hello and welcome back to my blog! Today I am hopping with some friends on Instagram for the May 2023 Instahop. We are an international group of stamping friends and the theme for May is "In Colours". I managed to use all of the 2023-2025 In Colours in my card today and have really taken to the new colours.

I used the Colour & Contour stamp set and coordinating dies, colouring the flowers with Stampin' Blends. I also used the Bough Punch and 2023-2025 In Colour Dots.

Click this link to visit my Instagram page HERE to hop around to each participant. 

Instructions:

- Use a piece of Pebbled Path A4 card, cut in half lengthwise and folded and layer with a piece of Basic White card. Layer with another piece of Basic White card which has had the dotted image from the Color & Contour set stamped with Copper Clay ink softly and also Pebbled Path ink splattered onto it.
 
- Stamp images from the Color & Contour set using Pebbled Path ink onto Basic White and use Stampin' Blends (Boho Blue, Mood Mauve and Wild Wheat). 

- Use the Bough Punch to cut some leaves/branches from Basic White card and colour with Pebbled Path Stampin' Blends and a Colour Lifter. Adhere all the images and leaves to the card front.

- Stamp a sentiment from the Color & Contour set onto Basic White with Pebbled Path ink. Add some 2023-2025 In Colour Dots to complete the card.

____________________________________________

I have a tutorial bundle available. This Create With Us Tutorial Bundle features 15 tutorials from Stampin' Up!® designers from around the world and this month we have all created projects that highlight the Rain or Shine Suite Collection. This is an amazing tutorial with so many fantastic ideas.

Visit my Tutorial Page HERE to purchase this bundle or various others I have available.
Read more »
Annie A
0 Comments
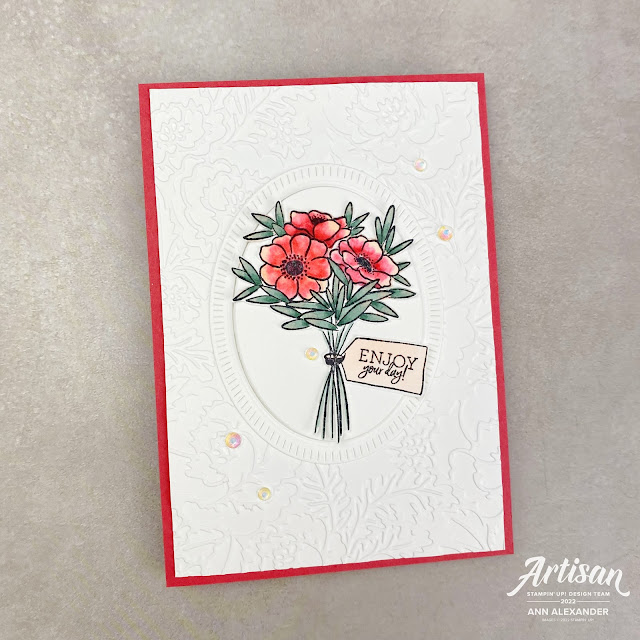
Enjoy Your Day - Amazing Year - GDP365 Colour Challenge

Enjoy Your Day - Amazing Year - GDP365 Colour Challenge


Hello and welcome back to my blog! Today's card is for Global Design Project's GDP365 Colour Challenge . This week we are doing a fun colour challenge using Soft Succulent, Sweet Sorbet and Petal Pink.

For this card, I used the Amazing Year stamp set and coloured the image with Stampin' Blends. I used the Framed Florets Dies and Pretty Flowers Embossing Folder to create the frame and background.


Instructions:

- Use a Sweet Sorbet A4 card, cut in half lengthwise and folded. Layer with a piece of Basic White embossed with the Pretty Flowers Embossing Folder.

- Die cut a frame and background from Basic White using the Framed Florets Dies. Adhere the frame to the card and use dimensions to lift the oval background to add dimension. 

- Stamp the image from the Amazing Year stamp set onto Basic White using Tuxedo Black and colour with Stampin' Blends in the challenge colours. Fussy cut the image out and adhere to the oval background. Add some Iridescent Rhinestone Basic Jewels to complete.

_______________________________

I have a new tutorial bundle available this month. The October 2022 Create With Us Tutorial Bundle features 15 tutorials from Stampin' Up!® designers from around the world and this month we have all created Seasonal Fun Folds. I have seen all the projects and they are spectacular. You won't want to miss this bundle. 

Visit my Tutorial Page HERE to purchase this bundle.
____________________

I also have a tutorial bundle available highlighting the Splendid Day Suite Collection containing 27 Tutorials from myself and demonstrators from all over the world. All tutorials contain measurements in both Imperial and Metric.


Visit my Tutorial Page HERE for more information, or visit the top of this page and click the link.
_______________________________

Subscribe to my newsletter HERE

My OCTOBER 2022 Host Code: SM6GNXDM . When you spend over $40 in my store, you will receive a handmade card and a FREE gift from me.

If you would like to purchase any of these supplies, please click here

Please email me if you would like a copy of the 2022-2023 Annual Catalogue or the July-Dec 2022 Mini Catalogue.

Click to JOIN my team

If you would like regular updates from me, click my newsletter link here.

Follow me on social media via FacebookInstagram and Pinterest.

Hope you are getting some crafty time today, chat soon!

Product List: (Additionally Framed Florets Dies)
Read more »
Annie A
0 Comments
Color & Contour Bundle

Color & Contour Bundle


Hello again! I have two quick cards today using the Colour & Contour bundle. This stamp set is being highlighted today by Stampin' Through the Catalog.

For my first card, I created a clean and simple card using the Colour & Contour stamp and coordinating dies as well as the Textures & Frames stamp set ( a Sale-a-bration stamp set that you can get FREE if you spend over $90 in the Australian Stampin' Up!® store). 


Use a Smoky Slate card base, mat with a smaller piece of Basic White then stamp three images from the Texture & Frames stamp set with Smoky Slate ink. Stamp the floral image onto a piece of Basic White with Tuxedo Black ink and  colour the image with Stampin' Blends (Calypso Coral/ Olive Green). Stamp the sentiment with Tuxedo Black ink and add some Rhinestone Basic Jewels which are coloured to match using the Calypso Coral Stampin' Blends.

For the second card, use an Evening Evergreen card base and a layer of Bloom Where You're Planted DSP and Vellum. Emboss a piece of Evening Evergreen card with the Greenery Embossing Folder and then die cut using the Scalloped Contours dies from the bundle. 

  
Stamp the floral image onto Basic White with Tuxedo Black and die cut. Colour with Polished Pink and Soft Succulent Stampin' Blends and adhere the image to the Evening Evergreen panel with Glue. Stamp the sentiment onto Basic White with Tuxedo Black ink and adhere with dimensionals. Use Evening Evergreen and Polished Pink ribbon and attach to the card using Mini Glue Dots.

Don't forget to subscribe to my newsletter as I will have dimensions for these card. 

Don't forget to visit my Tutorial page for the Dandy Garden Mega Tutorial Bundle which contains 62 tutorials for Dragonfly and Dandy Garden inspiration from Demonstrators all over the world. I also have my Love You Always - Mosaic Card Tutorial available as a tutorial too.

Read more »
Annie A
0 Comments
I am an Independent Stampin' Up! Demonstrator