Showing posts with label Pierced Blooms. Show all posts
You Really Are The Best - In Bloom - Use Your Stash April 2025

You Really Are The Best - In Bloom - Use Your Stash April 2025


Hello and welcome back to my blog! Today's card is for the 'Use Your Stash" Instagram Hop. I am joined by an amazing lineup of crafters so make sure you go to my Instagram page HERE to see the rest of the team's creations. 

The aim of the hop is to use up some of the huge stash that we all accumulate. Hopefully it will also inspire both ourselves and others to combine some of our old and new products to reduce that stash.

This month's theme is "Retired Colour". One of my all time favourite colours is Polished Pink (no surprise that one of the pinks is a favourite) which was part of the 2021-2023 In Colour range. I actually loved all five of the colours from that range so decided use a couple of the other colours - Pale Papaya & Soft Succulent.

I used the In Bloom stamp set and coordinating Pierced Blooms Dies, Cross Hatch Embossing Folder, 2021-2023 In Colour Treat Bags, Iridescent Rhinestone Basic Jewels and Stampin' Blends (all retired).


Instructions:

- Use Basic White card for the base. Use another piece of Basic White card and layer with a piece of a Pale Papaya Treat Bag and then emboss them both with the Cross Hatch Embossing Folder.

- Die cut multiple flowers and leaves using the Pierced Blooms Dies from Polished Pink and Basic White card. Colour some of the Basic White flowers and leaves with Stampin' Blends (Pale Papaya and Soft Succulent).

- Layer the flowers onto each other and then adhere to the card. Add some Iridescent Rhinestone Basic Jewels both to the flowers and to the card front.

- Stamp the sentiment onto Basic White card using Tuxedo Black ink and adhere to the card with Stampin' Dimensionals.

___________________________________________

If you would like to purchase any of these supplies, please click here. 

Follow me on social media via Facebook and Instagram . Hope you are getting some crafty time today, chat soon!
Read more »
Annie A
0 Comments
Thankful for You - Sparkle of the Season - Just Add Ink #JAI579 - Just Choose Two

Thankful for You - Sparkle of the Season - Just Add Ink #JAI579 - Just Choose Two


Hello again and welcome back to my blog! I have another Just Add Ink Design Team post for you today.

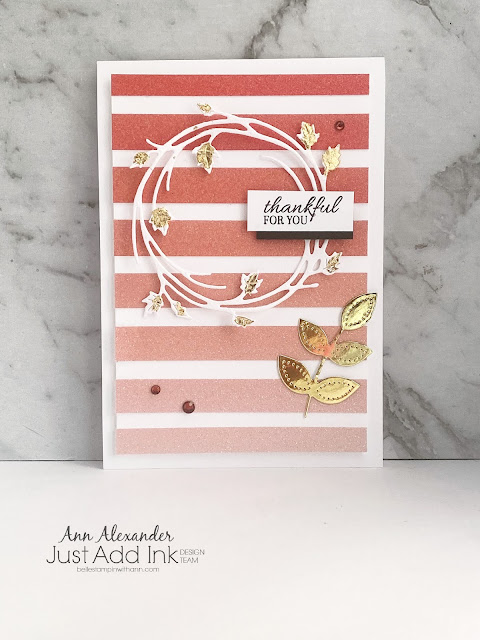
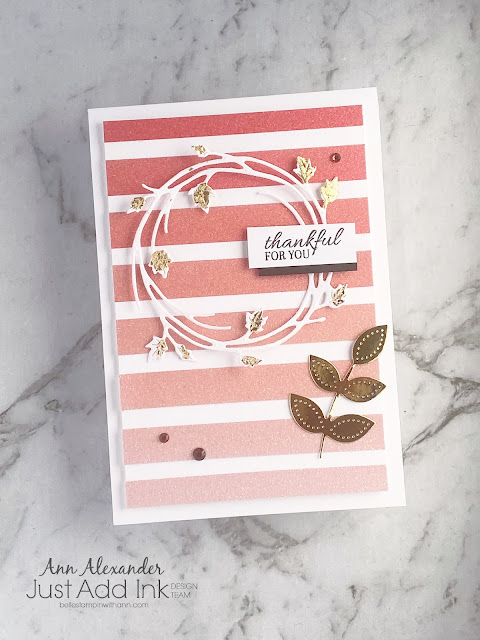
This weeks challenge is Just Add Ink #579..Just Choose Two - Foil, Glimmer or Shimmer . Now I adore Foil, Glimmer and Shimmer so this was a perfect challenge for me! I chose Glimmer and Foil as my two options. I decided to use the Ombré Specialty Glimmer Paper and do a scrappy strips type card. I also used the Seasonal Swirls Dies and added some Gilded Leafing to the leaves to add my foil element as well as the Pierced Blooms Dies to cut the Gold Leaf.


Instructions:

- Use a piece of Basic White A4 card, cut in half lengthwise and fold. Cut strips of the Ombré Specialty Glimmer Paper and attach with Stampin' Seal to a smaller piece of Basic White card which is then attached to the card base.

- Die cut the leafy wreath from Basic White card using the Seasonal Swirls Dies. Die cut a leaf from Gold Foil using the Pierced Blooms dies. Use Liquid Glue and and haphazardly add glue to different parts of the wreath, then apply Gilded Leafing to those areas. Rub off any excess. Attach the wreath to the card using Mini Stampin' Dimensionals. Adhere the die cut leaf to the card as well. 

- Stamp a sentiment from the Sparkle of the Season set onto Basic White card with Tuxedo Black ink and mat with a piece of Basic Black card and attach to the card. Add some Holiday Rhinestone Basic Jewels to the card. 


A close up view of the sparkle.


Will you be entering our challenge this week? We would love to see what you create. Click the image below to be taken straight to this weeks challenge.


Don't forget to subscribe to my newsletter as I will have dimensions for this card. 

Also don't forget to visit my Tutorial page for my brand new August-September 2021 Sale-a-bration Mega Tutorial Bundle which contains 39 tutorials. Even though Sale-a-bration has finished, there are so many inspiring tutorials in the bundle.I also have the Dandy Garden Mega Tutorial Bundle which contains 62 tutorials for Dragonfly and Dandy Garden inspiration from Demonstrators all over the world and the  Love You Always - Mosaic Card Tutorial available as a tutorial too which is a perfect tutorial for using Scrappy Strips! 

Read more »
Annie A
0 Comments
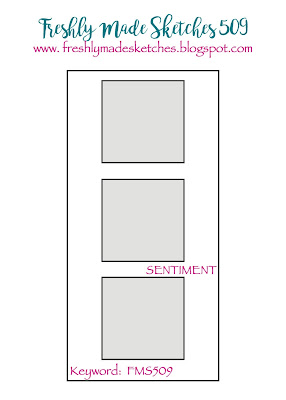
I miss you -  Art Gallery & Pierced Blooms - FMS509

I miss you - Art Gallery & Pierced Blooms - FMS509


Hello again! Today's card is one I have entered into the Freshly Made Sketches #FMS509 Sketch Challenge this week. 

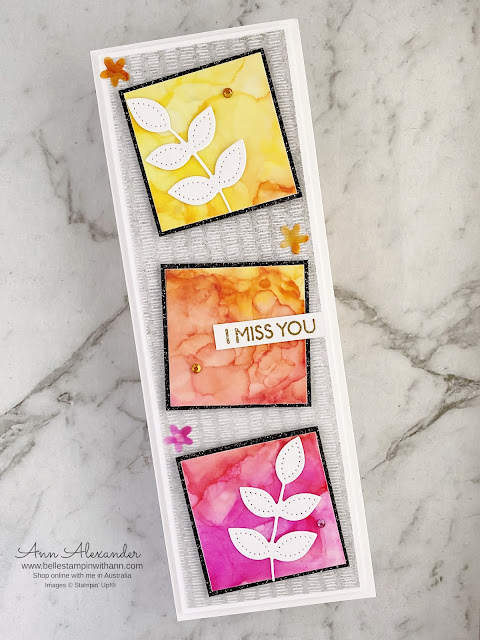
For this card I used the Art Gallery Stamp Set, Pierced Blooms Dies , Peaceful Place DSP, Black Glitter Paper and Stampin' Blends to create the alcohol ink background. Most of the items on this card were scraps from my desk. 

Instructions:

- Use a piece of Basic White A4 card, cut in half, and then folded in half lengthwise. Mat with a piece of Basic White card and then a piece of Peaceful Place DSP. Cut 3 squares from Black Glitter Paper

- Colour the back of a piece of Vellum with Stampin' blends and use Isopropyl Alcohol with an air blower and Water Painter to move the colours around. Cut 3 squares from this piece and mat onto the Black Glitter Paper (see THIS post for instructions on how to create these types of backgrounds). Attach the Squares onto the Peaceful Place DSP/ Card base.

- Use Pierce Blooms dies to die cut leaves from Basic White and some tiny flowers from the coloured Vellum. Attach the leaves and flowers to the card. Stamp a sentiment from the Art Gallery stamp set using Versamark onto Basic White card. Heat emboss with Gold Stampin' Emboss Powder. Attach to the card with Liquid Glue.

-  Add Holiday Rhinestone Basic Jewels and Stampin' Blends coloured Rhinestone Basic Jewels to the card.

Don't forget to subscribe to my newsletter as I will have dimensions for this card. 

Also don't forget to visit my Tutorial page for my brand new August-September 2021 Sale-a-bration Mega Tutorial Bundle which contains 39 tutorials. Even though Sale-a-bration has finished, there are so many inspiring tutorials in the bundle.I also have the Dandy Garden Mega Tutorial Bundle which contains 62 tutorials for Dragonfly and Dandy Garden inspiration from Demonstrators all over the world and the  Love You Always - Mosaic Card Tutorial available as a tutorial too. 

Read more »
Annie A
4 Comments
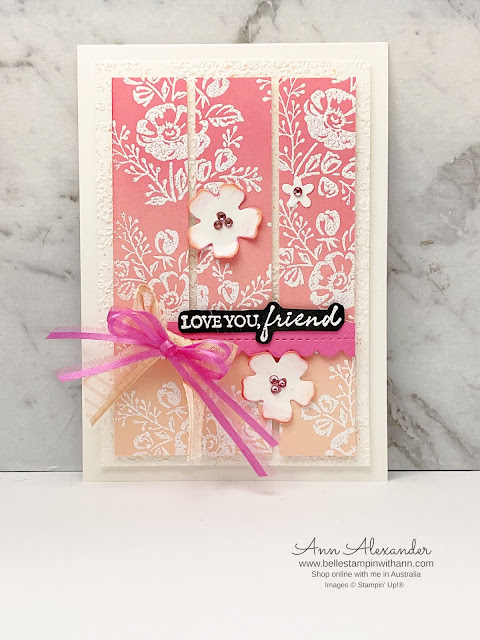
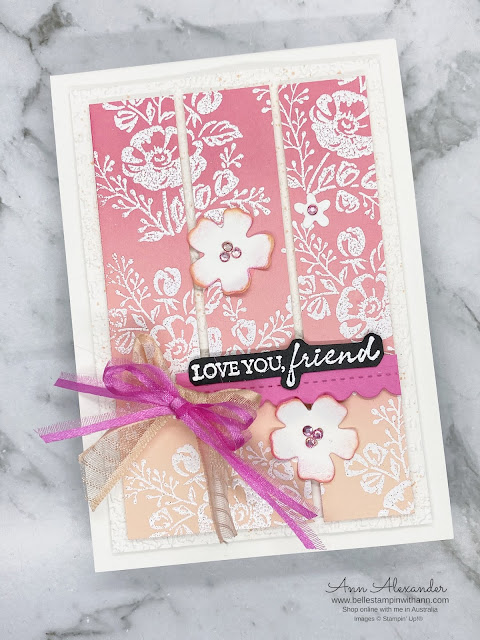
Love You Friend - Shaded Summer - TGIFC337 Sketch Challenge

Love You Friend - Shaded Summer - TGIFC337 Sketch Challenge


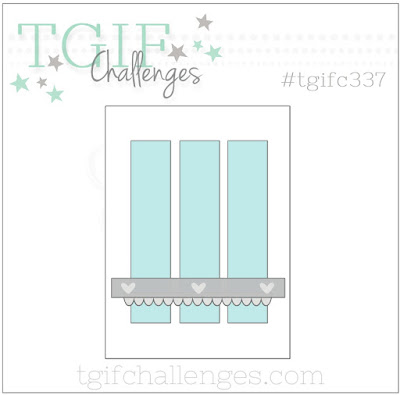
Hello again! Today's card is one I have entered into the TGIF Challenges #TGIFC337 Sketch Challenge this week. 

I just want to thank TGIF challenges as they chose me as their winner of their #TGIFC336 Colour Challenge last week. I am very grateful! 

For my card I used the Shaded Summer Stamp Set with the coordinating Summer Shadows Dies (recent Sale-a-bration item now retired), Penned Flowers Dies and ribbon. I blended Polished Pink ink onto Petal Pink card to create an ombré effect (the colour combination was inspired by Cindy Schuster).

Instructions:

- Use a piece of Basic White card, cut in half lengthwise and folded. Mat with a piece of Basic White card which has been embossed with the Timeworn Type Embossing Folder and splattered with Petal Pink ink. Attach using Stampin' Dimensionals.

- Use a piece of Petal Pink card and apply Polished Pink with a Blending Brush. Heat emboss the florals from the Shaded Summer onto this piece using Versamark Ink and White Stampin' Emboss Powder.  Cut the card into three 1" strips and attach to the card with Foam Adhesive. Also use Versamark and White Stampin' Emboss Powder on Basic Black card to stamp a sentiment from the Shaded Summer stamp set.

- Die cut some florals using the Summer Shadow Dies from Basic White. Use a Sponge Dauber to add Polished Pink and Petal Pink inks to the edges of the florals. Die cut a piece of Polished Pink card using the border die from the Penned Flowers Dies. Also use a small die cut flower from the Pierced Blooms Dies (leftover from a previous project). Attach the flowers to the card using Liquid Glue and attach the sentiment using Stampin' Dimensionals.

- Use Dark Polished Pink and Dark Petal Pink Stampin' Blends and colour some Rhinestone Basic Jewels and then attach to the die cut flowers. Tie bows using Petal Pink Organdy Striped Ribbon and Polished Pink Open Weave Ribbon (cut in half and tied in a bow). Attach the bows to the card using Mini Glue Dots.


Don't forget to subscribe to my newsletter as I will have dimensions for this card. 

Also don't forget to visit my Tutorial page for my brand new August-September 2021 Sale-a-bration Mega Tutorial Bundle which contains 39 tutorials and Dandy Garden Mega Tutorial Bundle which contains 62 tutorials for Dragonfly and Dandy Garden inspiration from Demonstrators all over the world. I also have my Love You Always - Mosaic Card Tutorial available as a tutorial too.

Read more »
Annie A
0 Comments
I am an Independent Stampin' Up! Demonstrator