Hello and welcome back. Today I have a set of cards for you for the Casually Crafting Design Team Blog Hop.
So who are we?
The Casually Crafting Design Team are a group of Independent Stampin' Up!® demonstrators from around the world that want to share our love of crafting with you all. We all love simple and easy cards, so you will see cards that are ideally suited for beginners and casual crafters. Sometimes we will also be showing stepped up versions for the more avid crafter.
We will sharing what we love every 3rd Saturday of the month. Make sure to check out the rest of the Design Team's creative projects using the links below.
For this month, I decided to share a few cards based around the Hello Dear Friend Card Kit. This card kit is perfect for the beginner or occasional crafter as well as being perfect for crafting on the go.
Firstly I created the cards as per the instructions in the kit, and here is what I came up with. The kit is an All-Inclusive Card Kit, and contains enough supplies for 12 cards, 3 each of 4 designs using the 'Hello Friend' stamp set ( a set with 7 stamps). It contains 12 cards with coordinating envelopes, an ink spot, stamping block and various matching embellishments.
These cards are so easy to create and they have such beautiful embellishments. I particularly love the foiled vellum.
I made one of each of the 4 cards as shown here on the blog.
You can step up these cards by adding using a few extra accessories. The next two cards use some of the products from the Hello Dear Friend Card Kit but I have added in some additional card, embellishments and stamping.
For the first card, I used one of the colours in the kit, Misty Moonlight
With this card, I used a Basic White card base, matted with a piece of Gold Foil (attached with Stampin' Dimensionals). I then used a piece of Misty Moonlight cardstock and stamped the leaf stamp from the stamp set in the kit all over the card, using Misty Moonlight ink to create a tone on tone effect. I attached this piece to the Gold Foil using Stampin' Seal to ensure good adhesion.
I then used an embellishment piece from the Forever Gold Laser-Cut Specialty Paper and attached it the card using Stampin' Dimensionals. I used one of the flowers from the Hello Dear Friend Kit, tied a piece of the Gold Trim from the Forever Greenery Trim Combo Pack around the stem and attached the flower to the Gold Laser-Cut piece using Stampin' Dimensionals.
I stamped the sentiment from the kit stamp set using the Misty Moonlight ink onto a small strip of Basic White card stock. I fussy cut that out, then attached the sentiment to a piece of Misty Moonlight card and fussy cut that piece too. I attached the sentiment to the card with Mini Stampin' Dimensionals.
I added a few Rhinestone Basic Jewels to add a final bit of bling to the card. I also stamped the leaf stamp on the inside of the card and added a Rhinestone.
Measurements:
- Basic White card base A4/Letter cut in half lengthwise and folded
- Gold Foil layer: A4 5 5/8" x 3 7/8"/ 14.4 x 10 cm or Letter 4" x 5 1/4"
- Misty Moonlight layer: A4 5 3/8" x 3 5/8"/ 13.9 x 9.5 cm or Letter 3 3/4" x 5"
For this next card, I used another one of the colours that coordinate in the kit - Melon Mambo. I used some blending brushes and masks to add some interest to the card.
I used Basic White card for the card base. With another piece of Basic White card, I used the Stampin' Up!® Blending Brushes to add a soft pink colour to this next layer with Melon Mambo ink. I attached this piece to the card base using Multipurpose Liquid Glue.
I then used a piece of Melon Mambo card and blended some Magenta Madness ink through one of the Basic Pattern Decorative Masks. I chose a Magenta Madness to give it a more pink tone. I used the Magenta ink to stamp the sentiment onto a piece of Basic White. I attached the Melon Mambo card to the card base using Liquid Glue.
I used one of the Foiled Vellum pieces from the kit, and attached it to the Melon Mambo card using Liquid Glue in the areas that were hidden under the embellishments.
I tied a single loop using the Copper Cord in the kit and attached it under the floral image and leaves which I attached to the card using Stampin' Dimensionals.
I attached the sentiment (from the kit stamp set) onto a small strip of Melon Mambo card and attached it onto the card using Stampin' Dimensionals. I then added some Rhinestone Basic Jewels to the card.
I stamped the leaf from the stamp in the kit using the Magenta Madness ink on the inside of the card and decorated it with a jewel.
Measurements:
- Basic White card base A4/Letter cut in half lengthwise and folded
- Basic White (blended with Melon Mambo ink) : A4 5 5/8" x 3 7/8"/ 14.4 x 10 cm or Letter 4" x 5 1/4"
- Melon Mambo layer: A4 5 1/2" x 3 3/4"/ 14.2 x 9.8 cm or Letter 3 7/8" x 5 1/8"
- Vellum Foiled layer: as per kit
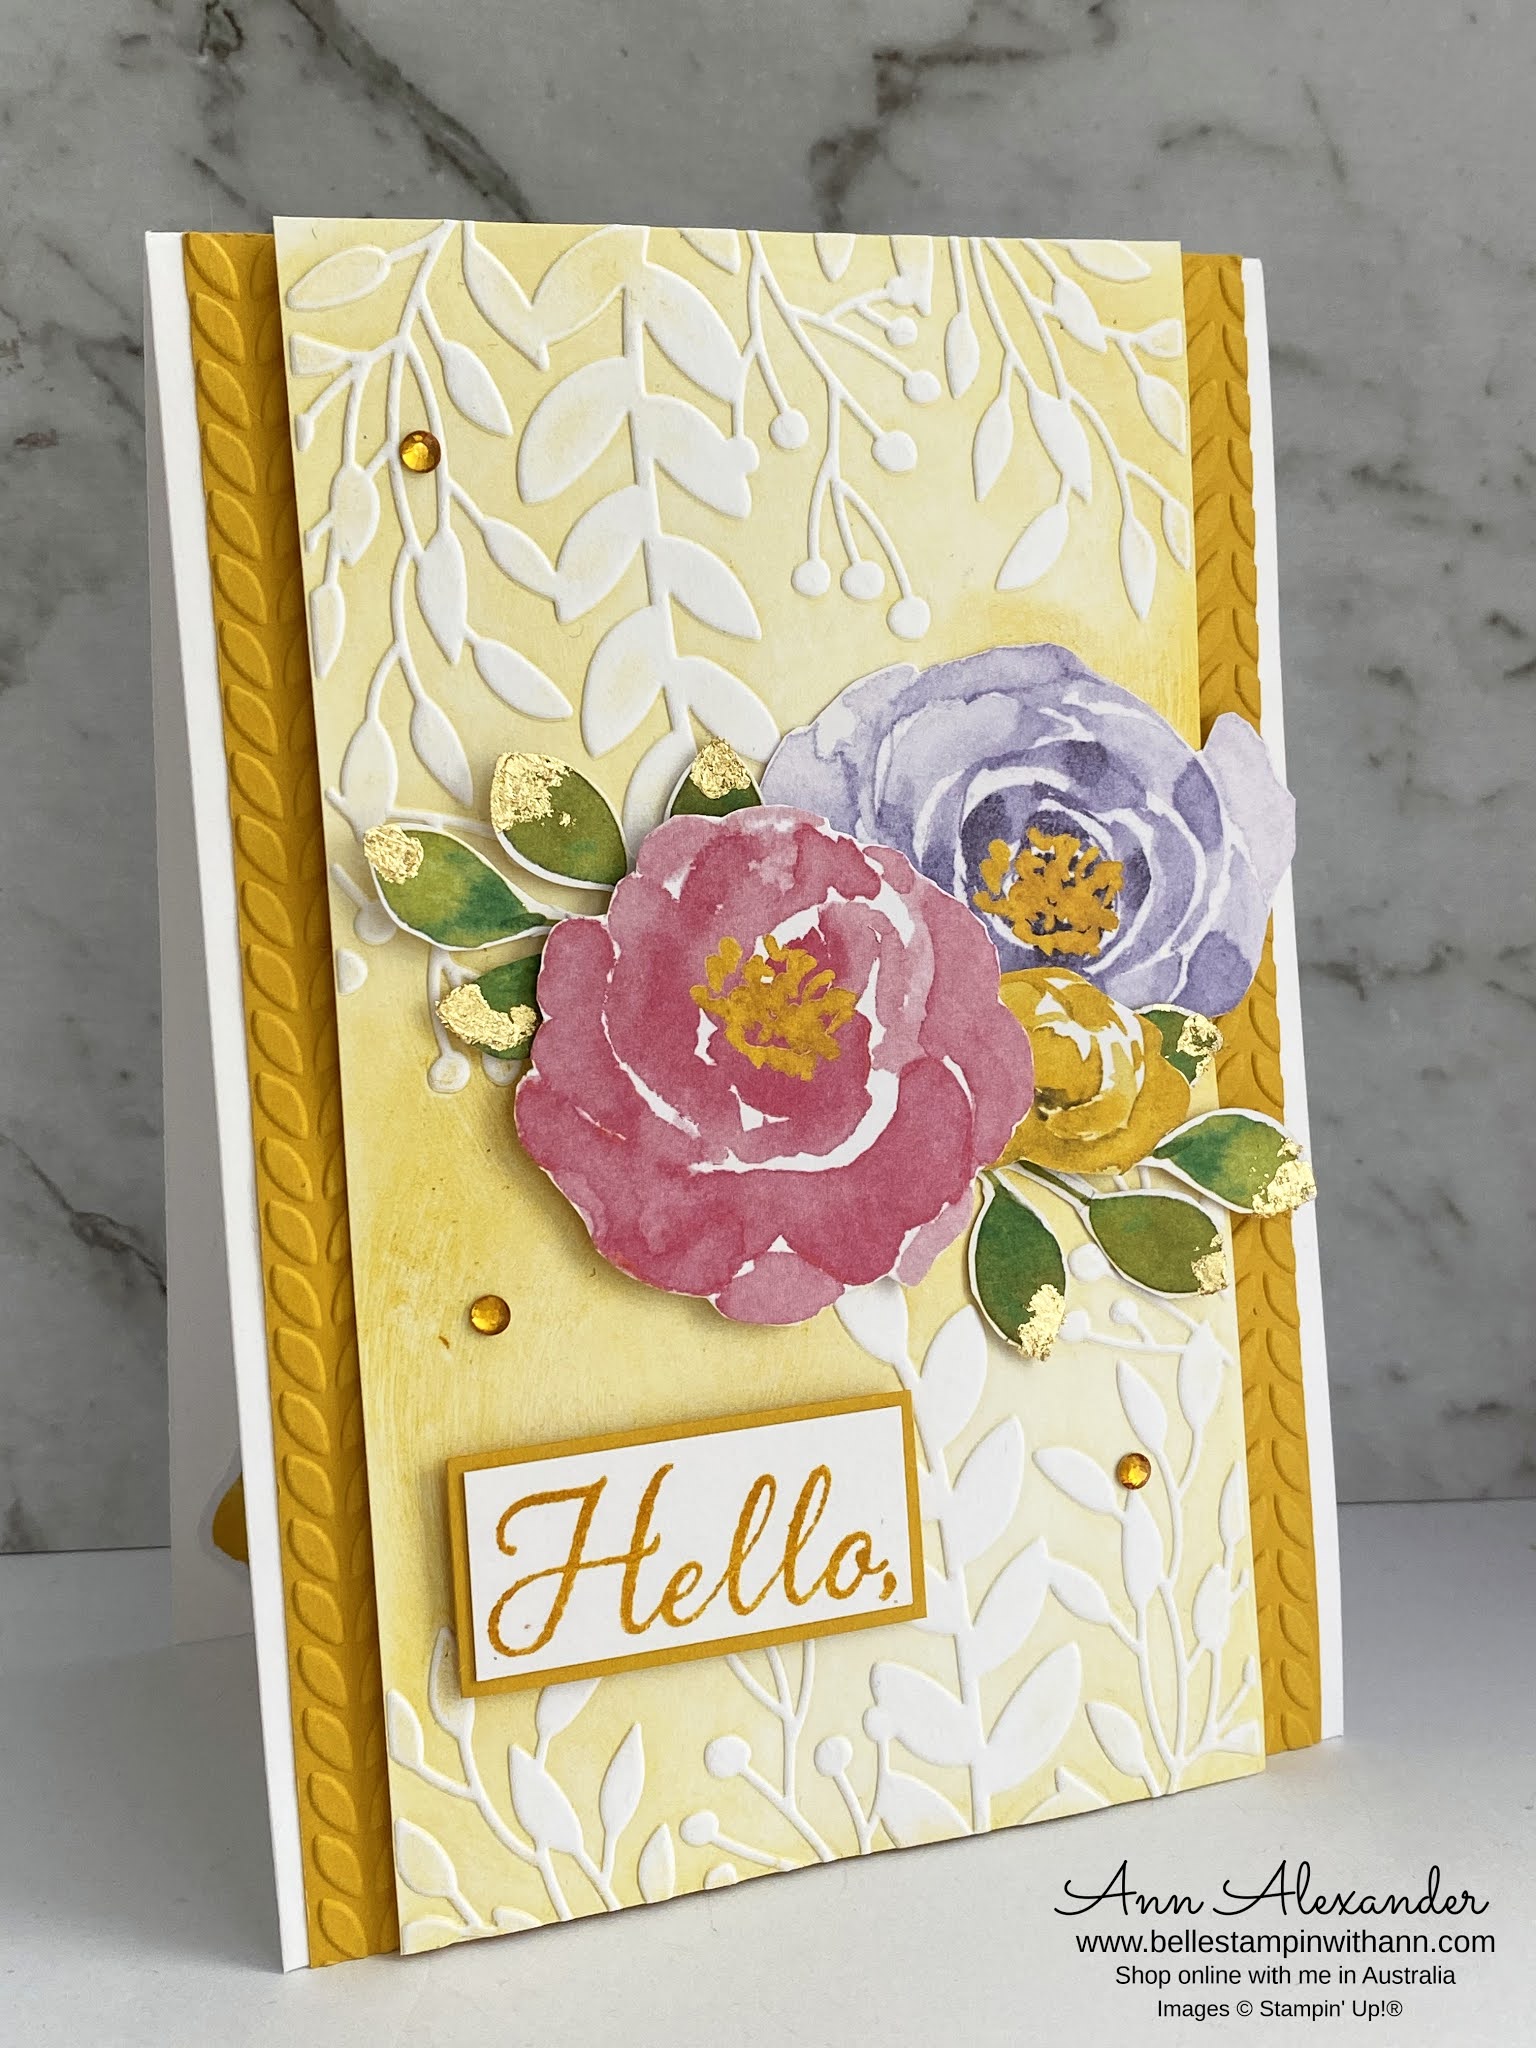
My final card is for the avid crafter who has a die-cutting/embossing machine but still uses elements from the kit and another of the coordinating colours of the kit - Crushed Curry.
I again used Basic White for the card base. I used the Greenery Embossing Folders and embossed a piece of Crushed Curry card with the one of the two folders. I attached this card to the card base with Multipurpose Liquid Glue.
I then used the other Embossing Folder with the florals on it, lightly added Crushed Curry ink to the flat side and embossed a piece of Basic White to give the soft yellow background to the card. I then attached this piece of card to the card base with Stampin' Dimensionals.
I fussy cut the leaves and flowers that were in the Hello Dear Friend Kit. I then used some Multipurpose Liquid Glue on the ends of the fussy cut leaves. I waited until the leaves were tacky and then used some Gold Gilded Leafing flakes on those tacky areas to give all the leaves a gold tip. I attached the flowers and leaves with Liquid Glue and Stampin' Dimensionals.
I stamped the 'Hello" part of the 'Hello dear friend' sentiment from the kit stamp set using Crushed Curry Ink onto Basic White card. I did this by inking up the whole sentiment with ink, and placing a piece of scratch paper under my card and then stamping at the very edge of the Basic White strip so that only the 'Hello' was stamped onto it.
I matted this sentiment with a strip of Crushed Curry ink and attached it to the card using Stampin' Dimensionals. I added some yellow Holiday Rhinestone Basic Jewels onto the front of the card. I also added another flower from the kit onto the inside of the card.
Measurements:
- Basic White card base A4/Letter cut in half lengthwise and folded
- Crushed Curry : A4 5 7/8" x 3 7/8"/ 14.9 x 10 cm or Letter 4" x 5 1/2"
- Basic White embossed layer: A4 5 7/8" x 3 1/4"/ 14.9 x 8.7 cm or Letter 3 3/8" x 5 1/2"
I really enjoyed making these cards and I hope you like them too. Kits are a great way to make simple cards but as you can see, with a few extras you can really step it up.
Please leave me a comment and let me know which card you prefer.
You may be starting here or may have come from another blog - either way you can find the blog link list below, so that you can see every blog post and idea today.
Blog Links:
Please feel free to email me if you have any questions. Don't forget to visit my Tutorial page for the Dandy Garden Mega Tutorial Bundle which contains 62 tutorials for Dragonfly and Dandy Garden inspiration.
My March 2021 Host Code: 9CYNPRKH . When you spend over $40 in my store, you will receive a handmade card and a FREE gift from me.
If you would like to purchase any of these supplies, please click here.
Please email me if you would like a January-June 2021 Catalogue or a 2020-2021 Annual Catalogue (Australia only).
Click HERE (or the link at the top of the page) to join my team.
If you would like regular updates from me, click my blog link here, and my newsletter link here.
Follow me on social media via Facebook, Instagram and Pinterest.
Have a great day and hope you are having a crafty weekend.
Product links below.
Cards 1- 4:
Product List
Card 5
Product List
Card 6
Product List
Card 7
Product List


")


Wow, great job. You really have given me lots of inspiration. Tfs
ReplyDeleteThank you so much for your comment x 😊🙏🏼
DeleteFabulous cards - I haven't opened my kit yet. but you have inspired me. Thanks for sharing and hopping with us today x
ReplyDeleteThank you so much for your comment, it is such a pretty kit, I am sure you will enjoy the ease of it when you get a chance to play with it x 😊🙏🏼
DeleteGreat cards Ann! Thanks for sharing how to step up the kit too! :)
ReplyDeleteThank you so much Deb for your lovely comment x 😊🙏🏼
DeleteThese are so beautiful! Thanks for sharing such lovely projects!
ReplyDeleteThank you so much, I really appreciate your comment! x😊🙏🏼
Deletelovely card...love this kit and like how you stepped them up
ReplyDeleteThank you for your lovely comment! 😊🙏🏼
DeleteLovely Card Ann!
ReplyDeleteThank you so much for your comment Maheswari! 😊🙏🏼
DeleteWow, what beautiful cards. Amazing how much you can stretch the kit too. Very inspirational.
ReplyDeleteThank you so much, I really appreciate your comment! 😊🙏🏼
DeleteOh I do love the cards in this kit, and you've stepped then up too. Really pretty
ReplyDeleteThank you so much Heather, I really appreciate your comment! 😊🙏🏼
Delete